
After testing a large-format case from be quiet!, we’re back to large-tower cases with Thermaltake. The brand recently launched its CTE case series, and generously offered us the CTE T500, the smallest model in the family. We’re pleased to offer it for testing. Bear in mind, however, that although this is the smallest model, it’s far from small and compact!

The exterior of the CTE T500 :
If, like us, you were expecting a reasonably imposing case… Ouch. No, in fact it’s an imposing case, with dimensions of 274 (W) x 516 (D) x 615 (H) mm. Clearly, this is a serious performer, with dimensions larger than Corsair’s iCUE 5000X and slightly smaller than be quiet’s Dark Base Pro 901.
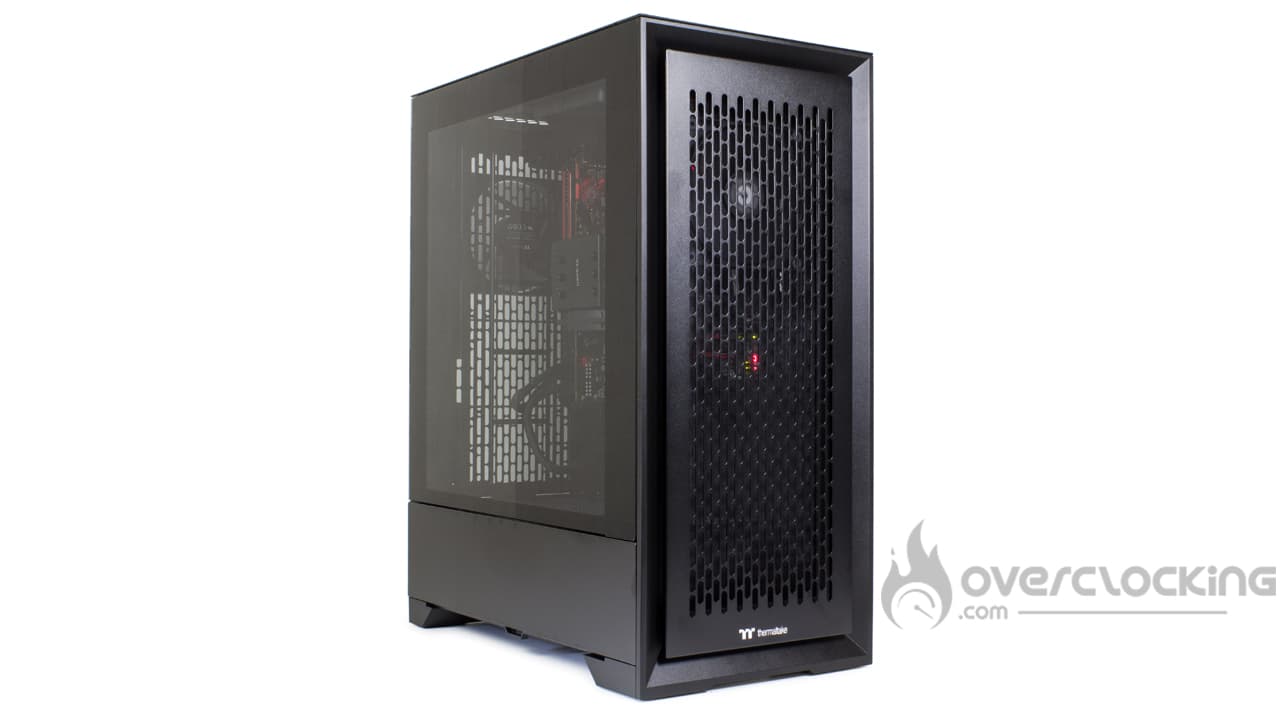
From a visual point of view, it’s clearly not the most extravagant case we’ve seen; on the contrary, it’s rather wise. Its front panel features a long ventilation grille with large openings, while a Thermaltake logo appears at the bottom. It’s relatively all-purpose, dimensions aside at least.
The choice of materials is mainly steel for the chassis and certain exterior parts. However, we also find some plastic on the front panel and tempered glass for the side window. All this, together with its imposing dimensions, makes for a particularly heavy case: 15.3 kg on the scales. Take care on delivery and during assembly.
On the other hand, as far as dimensions are concerned, we’re looking at a case priced at around €180 for the Air version. The TG models, on the other hand, cost around €200 with their front glass. Finally, this case is available in both black and white.
The control panel :

The case’s control panel takes its place at the top and won’t be easily accessible if your PC is on the desk. Certainly, you’ll have to stand up to access it. Nevertheless, it features :
- A reset button
- Two 3.5 mm jacks for headphones and microphone
- A storage activity LED
- A power button
- Two USB-A 3.0
- One USB-C 3.2 Gen2
As you can see, Thermaltake’s CTE T500 offers a fully functional control panel. Unlike NZXT, the brand doesn’t give in to the trend for minimalism, offering just a single USB-A, for example. Nevertheless, let’s keep in mind that we’re dealing with a full-size case.
The underside :

On the underside of the case, we’re treated to our own four feet with extra-grip rubber pads. While some may see these as a guarantee of stability, they will complicate matters during assembly: you’ll have to lift the case rather than slide it when you want to access the rear of the motherboard tray. On a 15 kg case, this means lifting it every time!
Otherwise, there’s a long dust filter running the length of the CTE T500. On the plus side, it can be accessed by sliding it to the side. That’s a change from housings where it’s only accessible from the rear, well done Thermaltake.
Rear :

The rear of the case is quite distinctive, with nothing special except a long ventilation grille. At the bottom, we find the power supply slot, and that’s it. Unlike more conventional cases, the motherboard’s I/O shield slot is in a different place!
The top :


On the top, we also have a large perforated grille that clearly favors air flow. This can be removed after unlocking it with two hand screws. Once removed, it reveals a fan and a grid beneath which are seven expansion slots. This is also where you’ll find the motherboard’s I/O shield slot.
Yes, we’re dealing with a case where the motherboard tray is oriented at 90°. This will become more obvious when we examine its interior.
[nextpage title=”Inside the CTE T500″]
Inside the CTE T500 :
The classic way to get inside is to remove the side panels, which are held in place by two captive hand screws. In itself, this is nice, but given the range of this model, we would have appreciated a more ergonomic mechanism.
The chassis :


Like the Dark Base Pro 901, this CTE T500 is compatible with a number of motherboards. If you wish, you can install E-ATX format 12 “x13” references. Otherwise, ATX, micro-ATX and mini-ITX boards will fit in without hindrance.
However, we would like to highlight the originality of the chassis, which is based on a motherboard tray oriented at 90°. As you can see, the motherboard’s connector section faces upwards, while the graphics card is mounted vertically.
Despite this unusual layout, there are plenty of openings for cables to pass through. On the bottom alone, there are four, two of which are covered by rubber grommets. On the left and right, there are three openings per side. So organizing cables shouldn’t be a major concern, especially as there’s 3.7 cm at the rear of the motherboard tray!
Storage slots :


The storage section remains classic, with a maximum of six storage slots. A 3.5″ hard disk or two 2.5″ SSDs can be fitted via a plate at the rear of the motherboard tray. The same operation is repeated at the fan support positioned at the motherboard’s wide backplate access.
Finally, at the bottom, beneath the power supply cover, we find a hard disk cage. This offers two 2.5″/3.5″ compatible baskets.
The power supply slot :

The power supply slot is clearly more basic than that of the Dark Base Pro 901. Here, there are no anti-vibration devices, no foamed rear surround or the like. No, Thermaltake offers something spartan with just two small plastic studs as support and that’s it!
Cooling options :
Where the CTE T500 really stands out, however, is in its cooling capabilities. This model can integrate up to eleven 120/140 mm fans, distributed as follows:
- Front: 3x 120/140 mm
- Rear: 3x 120/140 mm
- Top: 2x 120/140 mm
- Bottom: 2x 120/140 mm
- Backplate access: 1x 120/140 mm
Note that the case comes with three CT140 fans pre-installed as standard. There’s an intake fan at the front and a second, also intake, fan at the rear. The last fan is located at the top, mounted in extraction mode.
Compatibility with watercooling radiators is therefore very good. With an AIO, you’ll be able to fit a radiator measuring up to 420 mm at the front, as opposed to 360 mm at the rear or 120 mm at the top. With custom watercooling, you’ll have to make do with 360 mm models at both front and rear.
Finally, if you want to mount an aircooling-type ventirad, there’s no shortage of space either, as clearance is 195 mm at the top. Here, whether you have a MA824 Stealth or an Assassin IV, everything will fit!
The bundle:

The accessory pack supplied with the CTE T500 includes:
- Assembly instructions
- A bag containing nylon clamps, screws, etc.
- A plate with a cable entry for the power supply cover
- A tank/pump support
The accessory section focuses on the essentials, offering everything you need to assemble your setup. However, for custom watercooling configurations, a pump or tank can be fitted. Likewise, if you wish, you can even shorten the power supply cover with the supplied plate.
Small details:


Overall, despite its original chassis, the CTE T500 remains fairly basic. However, it does feature a honeycomb power supply cover. This is an interesting feature for mounting 100% passive power supplies. That’s right, heat will not be constrained and will therefore be able to evacuate naturally without being constrained by the power supply cover.
Otherwise, there are numerous Velcro strips on the back of the motherboard. These facilitate cabling by helping to secure cables to the back of the case. A welcome feature, especially as it’s reusable!
To sum up:
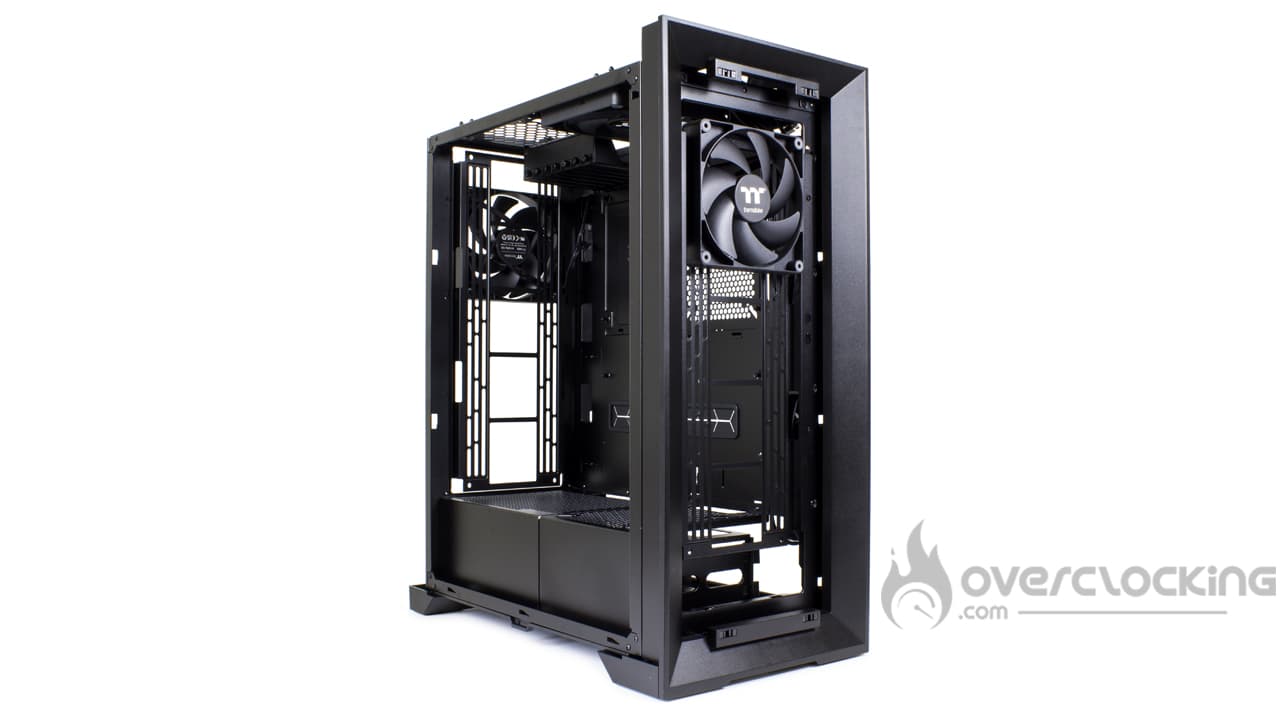
Broadly speaking, Thermaltake’s CTE T500 is an original case thanks to its internal layout and 90° motherboard tray. Likewise, it offers numerous fan slots, so you can assemble configurations that breathe, or indulge in custom watercooling.
[nextpage title=”Assembly”]
Assembly
We’re now ready to assemble our configuration inside this Dark Base Pro 901 from be quiet! Here are the components we’ll be using for assembly:
- Motherboard: Asus Crosshair VI Hero
- CPU: AMD Ryzen 7 1700X
- Graphics card: ASUS HD 7970
- Cooler: be quiet! Dark Rock 4
- Power supply: NZXT C1000 Gold
Power supply :
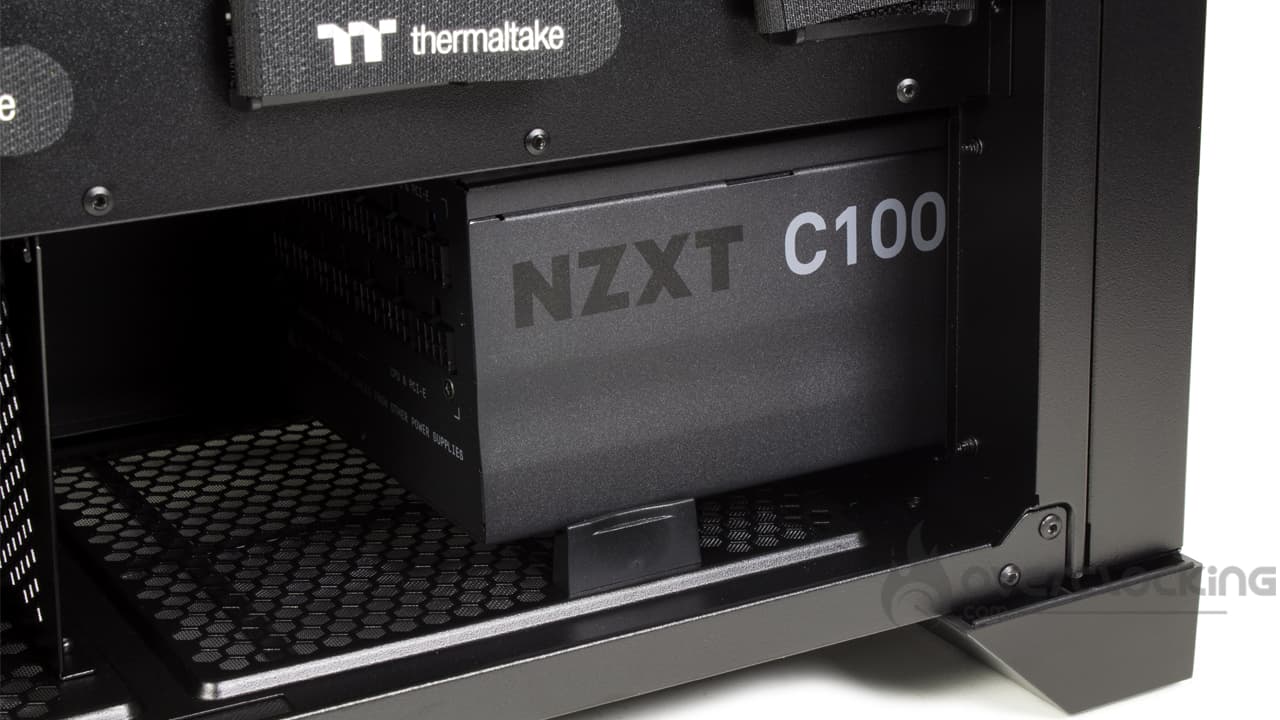
To mount the PSU, you can simply slide the PSU in from the side and finish by screwing it to the back of the case. This is feasible if your PSU is relatively short, as is the case with NZXT’s C1000 Gold.
Otherwise, the other option is to slide the power supply through the rear of the case. To do this, you’ll need to remove the rear grille of the CTE T500 to be able to unscrew the power supply surround and then screw it onto the block. Once this is done, you can slide it onto the back of the case, screw it back on and you’re good to go.
Storage:
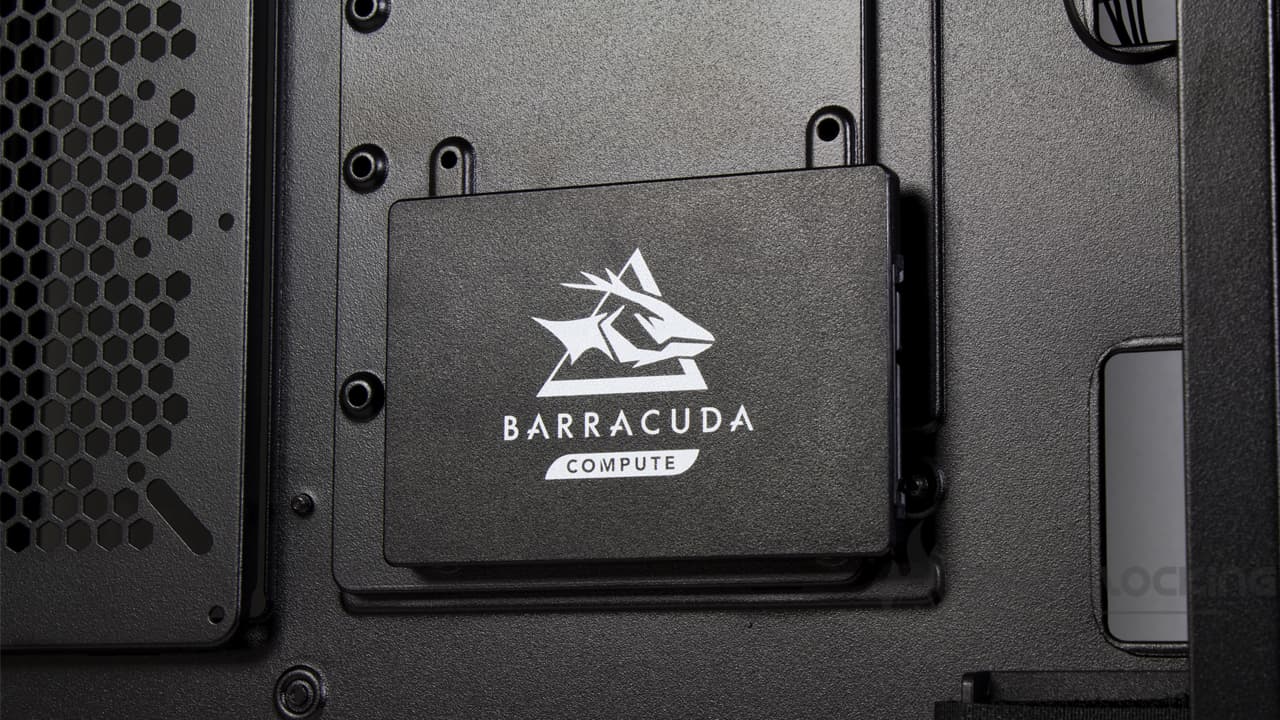
Mounting the SSD is really quite easy, since you’ll need to remove the plate held in place by a single hand-tight screw. Once removed, you can screw in your storage medium and then put everything back in place.
If you wish, you can mount the SSD in one of the HDD cage baskets. Simply remove the basket and attach the storage unit, then put everything back in its place. Just pay attention to the direction of the connectors, which should point towards the outside of the case.
Installing the motherboard :

On the motherboard side, there’s nothing really special either, except that you have to place it in its slot. There’s no extra spacer to screw onto the tray, or anything else. Just drop it in, screw it in, and you’re ready to go. What’s more, given the format, there’s plenty of room to handle the motherboard without running out of space, which is really nice.
Wiring :
Control panel:
With this CTE T500, Thermaltake is offering us something different when it comes to cabling. Indeed, given the particularity of the chassis, the wiring and connector output points are different from what we’re used to, and we’re not disappointed.
In this case, the control panel cables pass through the bottom before exiting through the openings at the rear of the case. In this way, you can connect the F_PANEL,HD_Audio andUSB 3.0. As forUSB-C, the cable passes through the first opening at the bottom before being plated..
Storage:
As far as storage is concerned, it’s a simple matter to bring the SATA cable bundle up from the rear of the case, while a power connector is brought out at the SSD.
 For the data part, we connect the cable to the SSD and then bring the cable back down to the motherboard. Once again, we use the Velcro strips along the way to secure the cables.
Motherboard, graphics card:
Finally, it’s the motherboard cabling where the orientation is a little more challenging. Indeed, given the positioning of the 24-pin ATX connector, the cable must not be too long, as the connector is located just above the power supply. Excess cable is stored in the power supply cover.
For the EPS12V CPU, we simply route the cable to the front of the case. We bring it up to the front panel before connecting it to the motherboard. Once again, we make the most of the Velcro strips along the way.
As for the 6- and 8-pin PCIe for the graphics card, they pass through the first opening just above the power supply unit. We’ve routed them this way in anticipation of the future positioning of our graphics card.
Installing the ventirad and graphics card :
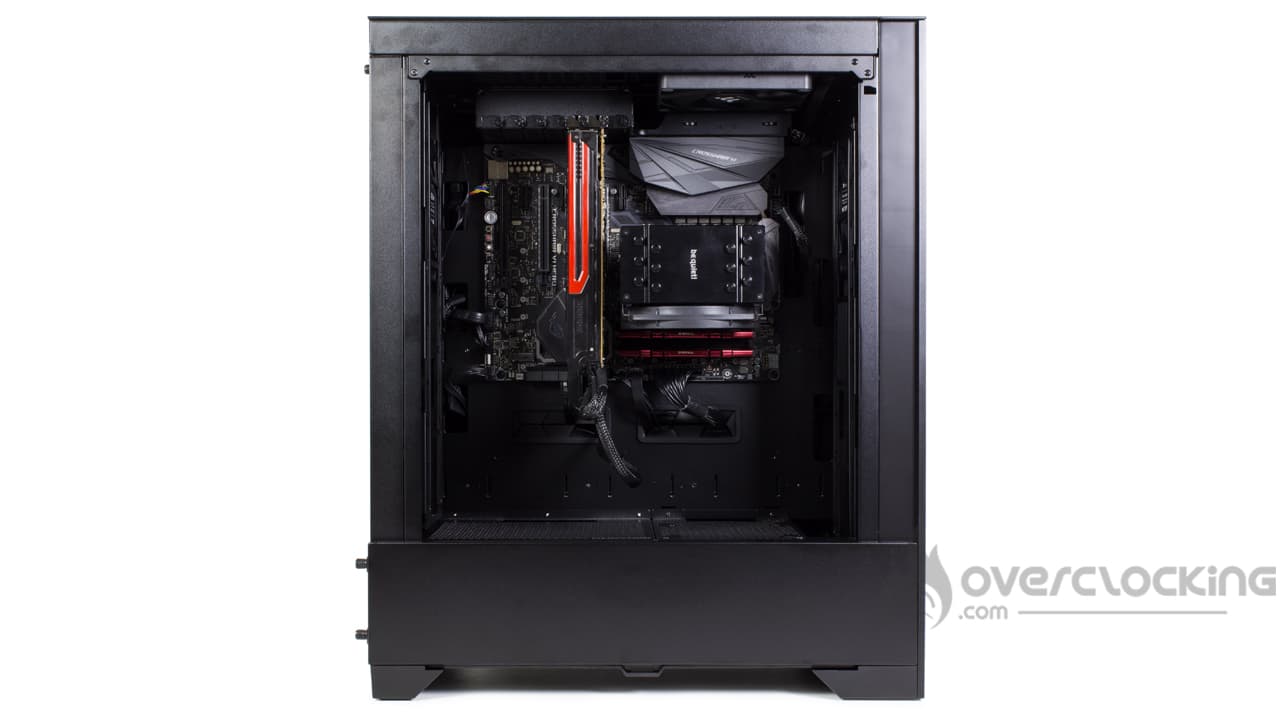
We continue with a little assembly, in particular of the ventirad. Yes, depending on the case, if the ventirad is mounted before wiring, sometimes there isn’t enough space to plug in the EPS12V CPU… This is not the case here, as space is at a premium.
In short, before accessing the motherboard backplate, you’ll need to remove the fan grill positioned at the rear of the tray. Once removed, access is unobstructed and the backplate can be held in place while the ventirad is fitted.
As for the graphics card, all you have to do is remove the PCIe brackets corresponding to its slot in the case, before plugging it in and powering it. Nothing too complicated. What’s more, with this positioning, no matter how bulky the graphics card, it will exert little pressure on the motherboard’s PCIe connector.
Overall:

In broad terms, Thermaltake’s CTE T500 is an original case, thanks to the 90° orientation of its motherboard tray. There’s plenty of space at both front and rear, and cabling is clearly uncomplicated thanks to the numerous Velcro strips here and there. All that remains now is to see how the case fares in terms of ventilation and cooling.
[nextpage title=”Protocol”]
We’ve updated our test protocol in order to test the qualities of our cases. We’ll be assessing the performance of the different models according to three criteria:
- Insulation
- Original ventilation noise
- Air flow
As far as adding ventilation is concerned, we’ve chosen to integrate two Thermaltake Riing 14 red fans. The first will be mounted on the power supply cover, as an intake fan. On the other side, the second fan will be mounted at the rear, also in suction to respect the airflow direction of the original ventilation.
Configuration :
- Processor: AMD Ryzen 7 1700X
- Motherboard: Asus Crosshair VI Hero
- Graphics card: reference ASUS HD 7970
- Cooler: be quiet! Dark Rock 4
- SSD: Corsair Force GS180 Go
- Power supply: NZXT C100 Gold
[nextpage title=”Tests”]
Tests
Airflow :
Additional ventilation takes the form of a Fractal Silent Series R2 fan positioned at the rear in extraction and a Riing 14 also positioned in extraction at the top.
CPU airflow, original ventilation then supplemented :
Let’s start with the CPU temperature. We’ll keep the front and top of our test case. Let’s see if the airflow is sufficient to cool the Ryzen 7 1700X properly.

In its basic configuration, the basic ventilation and overall airflow are more than adequate. By default, it’s one of the most efficient cases in terms of processor cooling. It has to be said that the large panels with their wide openings place few restrictions on airflow.
What’s more, there are still some interesting gains to be made by topping up the ventilation. If you have an air-cooling ventirad, the trick is to mount a fan on the power supply cover. Positioned so that it sprays the ventirad, we saved almost 6°C.
Original CPU airflow without front panel or top :
To ascertain the limiting factor in the story (and by how much), we remove the top covers while mounting the mesh front panel. The aim here is to show the raw performance of the integrated ventilation.

Removing the front panel as well as the upper part of the case has no great impact on the temperatures obtained on our processor. At low speeds, temperatures remain more or less the same, while with the fan fully up, temperatures drop by 1.6°C. As for the processor, the case is designed so that ventilation is only slightly affected by the front panel. With a glass front, it would have been a different matter.
GPU airflow, original ventilation then completed:
We repeat the operation, but with measurements taken on the graphics card. Here, we’re testing with original ventilation and supplemented ventilation.

On the graphics card side, the basic ventilation does a good job, since the temperatures obtained on our HD 7970 blower are satisfactory. It has to be said that, with a 140 mm fan directly spraying the graphics card, there’s nothing to worry about. Nonetheless, its positioning means that it will mainly be spraying the card shell and not the turbine, so we assume that this is why there’s 5°C up for grabs when topping up the ventilation.
Original GPU ventilation airflow without front panel ortop:
We repeat the same test, but remove the front and top panels. Let’s see how this affects card temperatures.
As with the processor, the various panels making up the CTE T500 clearly don’t hinder the cooling of the graphics card. By removing them, we only gain 4°C at low speed and 1°C at full speed on our good old CG. In comparison, it’s not impossible to achieve a 10°C difference with and without panels on other models like the MasterBox 520, for example.
Insulation :
Here, we’re simply measuring the noise emitted by our configuration when running CPU cooling and GPU cooling at high speed.
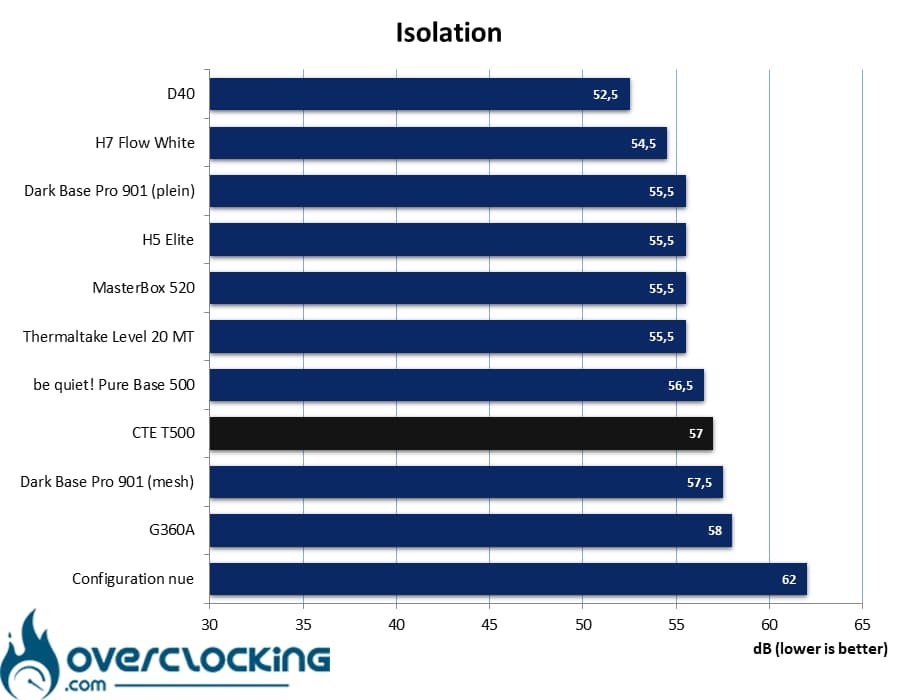
On the other hand, insulation isn’t exactly top-notch either. This is the disadvantage of this type of case: if you have panels offering little airflow restriction, this degrades your case’s natural insolation. As you can see, the D40 is well insulated, but on the other hand, it’s a component oven. You don’t want your components to be too noisy.
Original fan noise:
This time, we measure the noise emitted by the case’s original ventilation. To do this, the configuration is run in idle mode ( CPU and GPU ventilation at minimum), while readings are taken successively at 5V, 8V and 12V on the case ventilation.

Basic ventilation is not what you’d call particularly quiet. On the contrary, it tends to make itself heard as soon as it’s pushed up to the level of NZXT’s H5 Elite . Fortunately, as speed is reduced, the noise level drops below 37 dB at mid-range, stabilizing at 31 dB at low speed.
To sum up:
Thermaltake’s CTE T500 is a very good box in thermal terms. It is equipped with panels that offer very few restrictions on airflow. This is good news for our components, especially as the original ventilation is quite efficient, albeit noisy, particularly at high speeds.
[nextpage title=”Conclusion”]
We’ve now come to the end of our test of the Thermaltake CTE T500. So, good case or not? We tell you all about it!
An original chassis!
With this case, Thermaltake offers us an original reference featuring an unusual chassis. In fact, its 90° motherboard tray rarely crosses itself. What’s more, it guarantees the installation of numerous fans. What’s more, it offers plenty of space, making assembly and cabling much easier, especially as it comes with numerous Velcro strips positioned on the back of the motherboard tray.
Beware of weight and bulk:
Unfortunately, this CTE T500 is no slouch, and you’ll need to be solid on your feet to handle it serenely. We’re dealing here with a large case with imposing dimensions, yet boxing in the heavyweight category. You’ll need to find some space on or under your desk, and perhaps some help to move it around, especially as it doesn’t have any real sockets to simplify handling.
But it takes what it takes, since we’re also dealing with a solid all-steel construction… if we omit the glass window and the plastic on the front panel. All this is reflected in the final weight.
Good temperatures, but beware of noise :
Where this case really stands out is in thermal terms. Its wide-open panels allow fans to bring cool air inside. What’s more, three cleverly positioned 140 mm windmills are standard. By default, this model should efficiently cool your graphics card and CPU glass fan.
Now, beware of noise, as this is a rather “open” model. The panel openings, while good for airflow, are less so for insulation. In this respect, it’s rather average, all the more so as the original fans can be heard at full speed. Fortunately, by reducing their operating speed.
A high price :
As for the price, it inevitably stings a little, as the bill comes perilously close to €200. On the other hand, this is also the price of success, since we’re dealing with a full-size case, with good original airflow and an original chassis. What’s more, it’s more efficient in terms of temperature than a Dark Base Pro 901 at a lower price, while offering a good level of assembly quality (all steel). Admittedly, the price tag is starting to get steep, but the case is highly recommendable!
Thermaltake CTE T500:
We liked:
- The sober design and monolithic appearance!
- Quality all-steel construction
- Original chassis with 90° motherboard tray
- Generous interior space for mounting large configurations
- Lower dust filter accessible from the side of the case
- Cabling aids
- Excellent thermal performance!
- Consistent, if high, pricing
We didn’t like :
- Heavy weight (over 15 kg)
- The noise of the original ventilation, which quickly becomes noticeable
- Natural insulation sacrificed for airflow (but you can’t have both)
 Once again, this is a highly recommendable case. While the CTE T500 is an imposing model with perfectible soundproofing and audible ventilation, it also offers excellent airflow. Couple this with ample internal space and an original, well-built chassis, and you’ve got a little nugget. The only snag is the price: almost €200. While this may seem high, in view of the results, the price seems justified.
Many thanks to Thermaltake !

