





Inside the Invader X
Inside the Invader X:
The opening of the case is rather unusual in that, to remove the glass panel, you first have to remove the top part held in place by two hand screws. Next, two hand screws secure the side panel, which can then be removed by lifting. Clearly, a push-pin system would have been more suitable and would not have required dismantling the top part to open the case.
The chassis :


Cases compatible with MSI’s BTF and Project Zero motherboards are proliferating. As you can see, the motherboard tray of this model features additional openings for motherboards with reversed connectors.
Otherwise, this Invader X offers compatibility with ATX, micro-ATX and mini-ITX motherboards. As you can see, this model features numerous openings for cable routing. These are distributed over the top, bottom and sides of the motherboard tray.
At the rear, we’ll find quite a bit of space, particularly with a claimed rear space of 36 mm.
Storage slots :
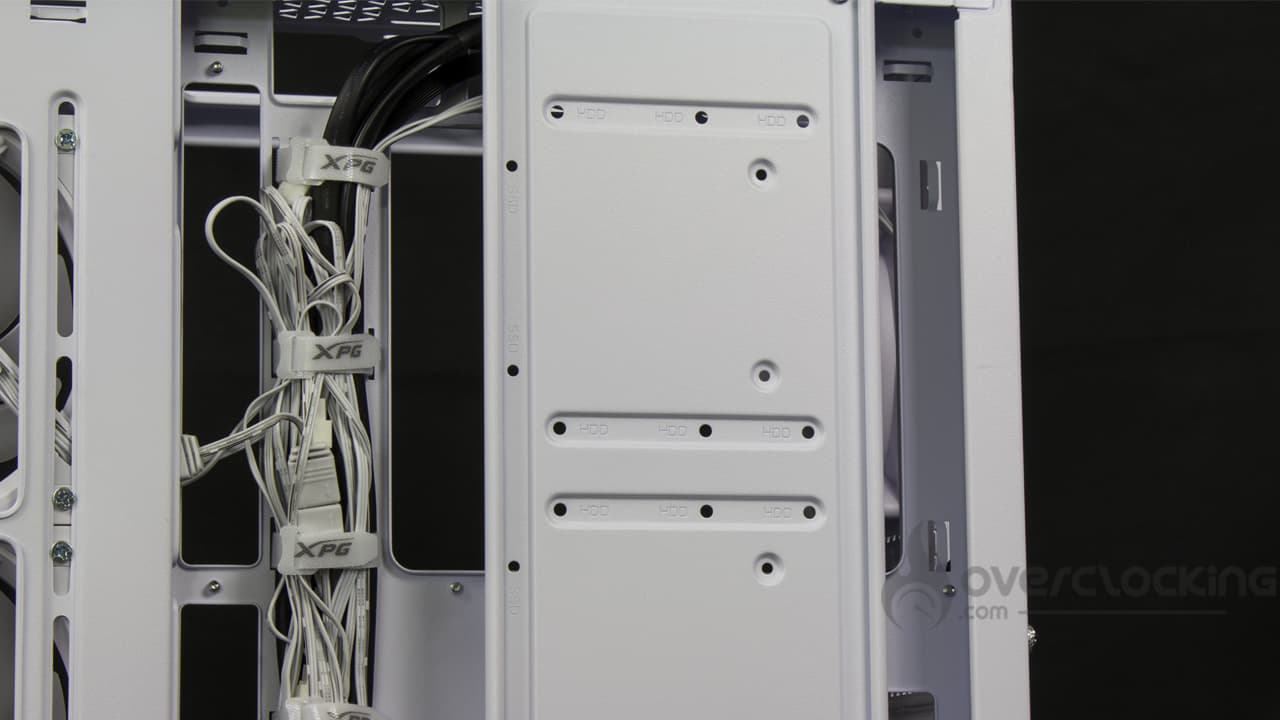
When it comes to storage, XPG goes straight to the point, offering a long board running the full height of the case. This is located at the rear of the motherboard tray, so you won’t see it. It allows the installation of three 2.5″ or 3.5″ storage units. What’s more, it’s removable and held in place by three Phillips screws.
Power supply location:
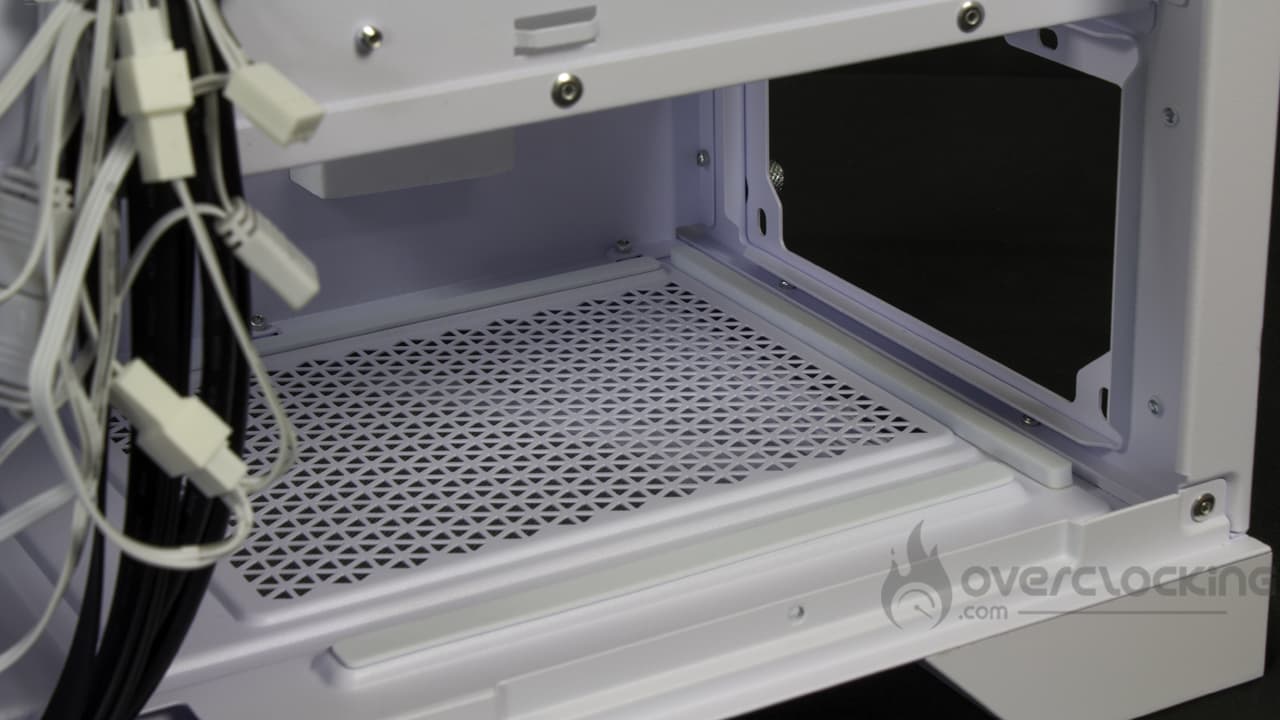
The power supply is located at the bottom of the case, under the cover. XPG takes care to equip its case with rubberized strips to limit the vibrations emitted by the PSU when the latter’s fan starts up.
The case can accommodate power supplies up to 240 mm in length, no more. Unfortunately, the cover is limited in length, so we won’t be able to “cheat” by removing a potential HDD cage mounted in the extension, for example.
Cooling options :
By default, two versions of the case are offered, this one, which arrives with full ventilation, and a second, with no fan supplied.
In our case, we find a case with a total of five 120 mm fans. Four of these feature inverted blades for greater style and performance. Three of them are mounted on the side of the motherboard slot, while the last one is located at the bottom. Finally, a last “classic” fan is mounted at the rear in extraction, where the other four are in suction.
If required, these can be completed by adding three additional 120 mm (2 x 140 mm) fans at the top. The power supply cover can also accommodate two 120 mm windmills. However, once installed, you won’t be able to fit a vertical support for the graphics card.
As for watercooling, this Invader X will allow 360 mm radiators to be mounted at the top, without condition. This is also possible on the side of the motherboard, but you’ll have to mount the graphics card vertically, at the risk of limiting its length to 270 mm. Finally, the rear is compatible with a 120 mm radiator.
Air-cooling cpu cooler mounting is also possible, especially as you’ll have 175 mm of free height. So don’t panic, a Dark Rock 5 can slide in easily.
The bundle:
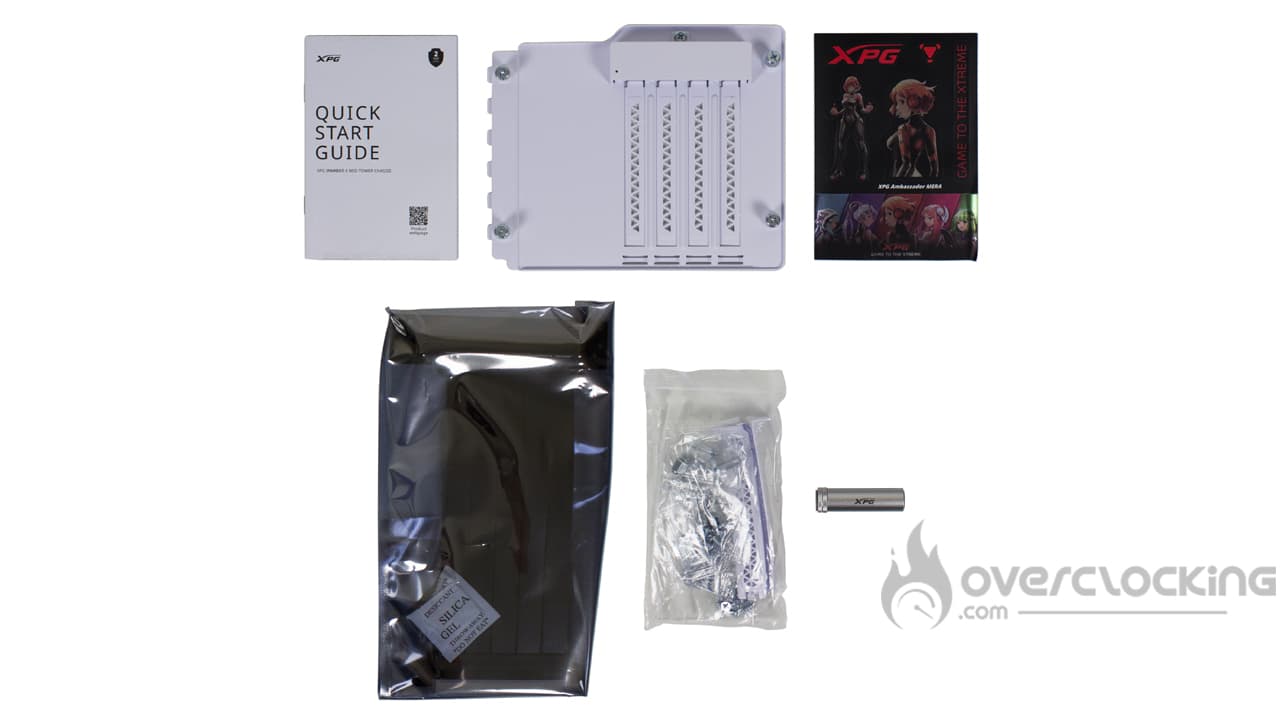
The following accessories are supplied with the case:
- A mounting guide
- A removable part with four vertical expansion slots
- A sheet of XPG stickers
- PCIe 4.0 x16 riser
- A bag containing screws and bolts
- Aluminum graphics card holder
We’re therefore dealing with a complete accessory section, with all the accessories needed to assemble our configuration. The brand even goes one step further with a vertical support and riser for mounting the graphics card. An aluminum bracket is also included. In short, we’re well taken care of.
The little details:


Once again, we’re dealing with a fairly basic case, but we’ll retain the fact that the power supply cover can accommodate two 120 mm fans.
Otherwise, behind the motherboard tray, we can see that Velcro strips are present to facilitate wiring. Nevertheless, with five aRGB fans fitted as standard, the latter already have their work cut out for them.
To sum up:
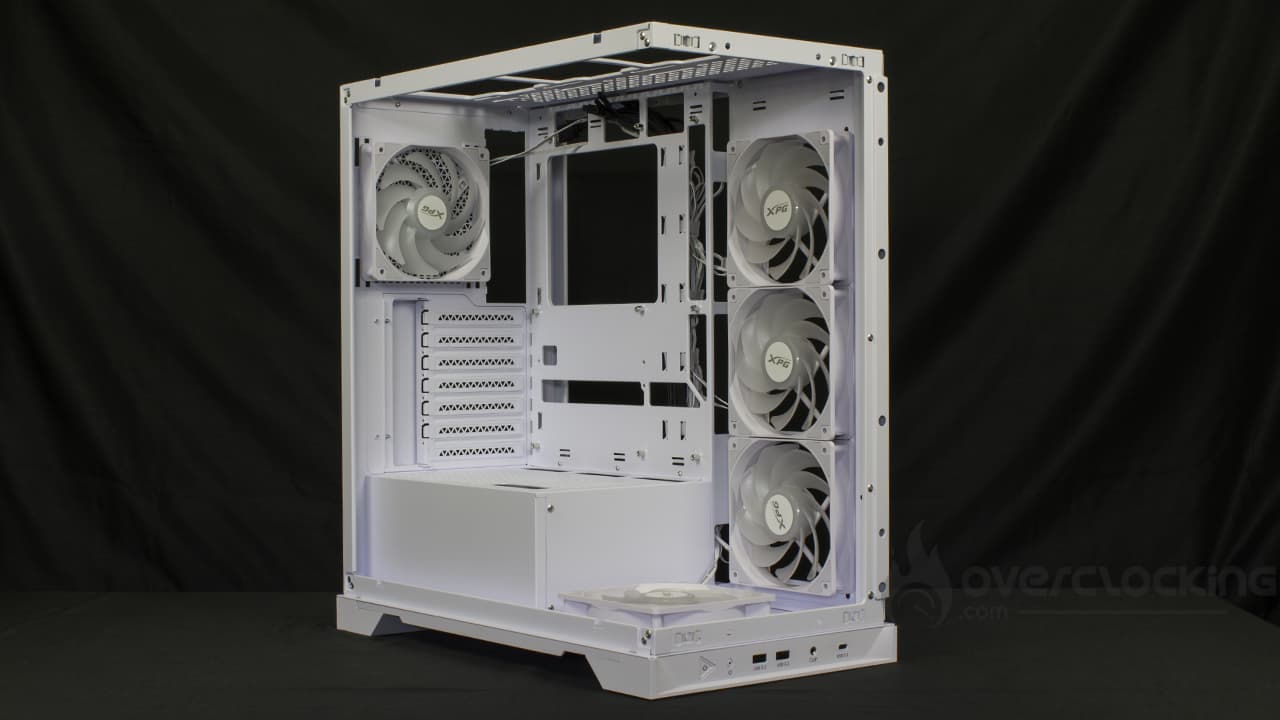
Broadly speaking, ADATA offers us a complete basic case with numerous fans. The accessories section takes things a step further, with horizontal and vertical brackets for graphics cards and a riser to go with them. It’s easy to understand why this model costs $170. A PCIe riser isn’t cheap!