
[nextpage title=”Introduction:”]
It’s definitely a busy time at Thermal Grizzly —not a week goes by without the brand announcing a new product. Today, we’re going to tell you about the WireView PRO II Wired. If you’re a regular visitor to our site, you know we already reviewed this product a few weeks ago. So what’s new? While the module itself—in terms of design and functionality—remains unchanged, the way you connect it to your graphics card has changed.
Until now, the WireView PRO II module plugged directly into the 12V-2×6 connector, which meant that—depending on your graphics card—you had to choose either a “Normal” or “Reversed” module based on the orientation of your graphics card’s power connector. However, some graphics cards were not compatible, such as the RTX 50 Founders Edition, for example. Thermal Grizzly therefore had the great idea of offering a module with a cable, ensuring full compatibility with all graphics cards on the market.

Thank you to Thermal Grizzly for providing us with a sample of this WireView PRO II Wired. As a reminder, we just reviewed the excellent Mycro Pro RGB LGA 1851 water block.
[nextpage title=”Unboxing the WireView Pro II Wired:”]
The bundle:
In February of this year, we tested the Reversed version of this WireView PRO II. Depending on the position of your 12V-2×6 power connector—and specifically the small tab that holds the cable in place—you’ll need to choose either the “Normal” or “Reversed” version. However, despite the availability of these two versions, some graphics cards remained incompatible, notably NVIDIA’s RTX 50 Founders Edition models. That’s where Thermal Grizzly solved this problem by offering a wired WireView PRO II in the “Wired” version. This version now comes with a 40 cm cable, which greatly improves the device’s compatibility with graphics cards.


As for the packaging, while the design remains the same, the box is much larger—most likely because the cable is built directly into the WireView PRO II. Upon opening, you’ll find a thank-you card for your purchase as well as an installation guide. Well-protected in a block of foam, our unit of the WireView PRO II Wired is revealed. As for the various cables, there are two 10 kΩ external temperature sensors (NTC), a USB-C to USB 2.0 adapter cable, and a Y-splitter cable for power delivery via the motherboard. The latter is used if you want the WireView PRO II to shut down the motherboard if an anomaly is detected. There are also three mounting brackets that allow you to attach the WireView PRO II either to your graphics card or inside your case.


A Closer Look atthe WireView PRO II Wired:
The WireView PRO II’s role is, quite simply, to monitor the current flowing through the 12V-2×6 pins on the graphics card. In the event of a failure or power supply issue, the device detects the anomaly and alerts the user with an audible alarm. Alternatively, you can configure it to shut down automatically if a problem occurs. In addition, its built-in display allows for real-time monitoring of the current flowing through each pin of the connector.


To optimize compatibility, Thermal Grizzly has included a cable approximately 40 centimeters long with the device, making it compatible with a wider range of graphics cards. Previously, it was impossible to use it with NVIDIA Founders Edition models, but this is now possible. In addition, this cable length makes it easy to position the unit at the end of your graphics card or simply inside your case, thanks to the included mounting hardware. Thermal Grizzly has included three cable clips, stamped with the brand’s logo, to keep the various cables organized.


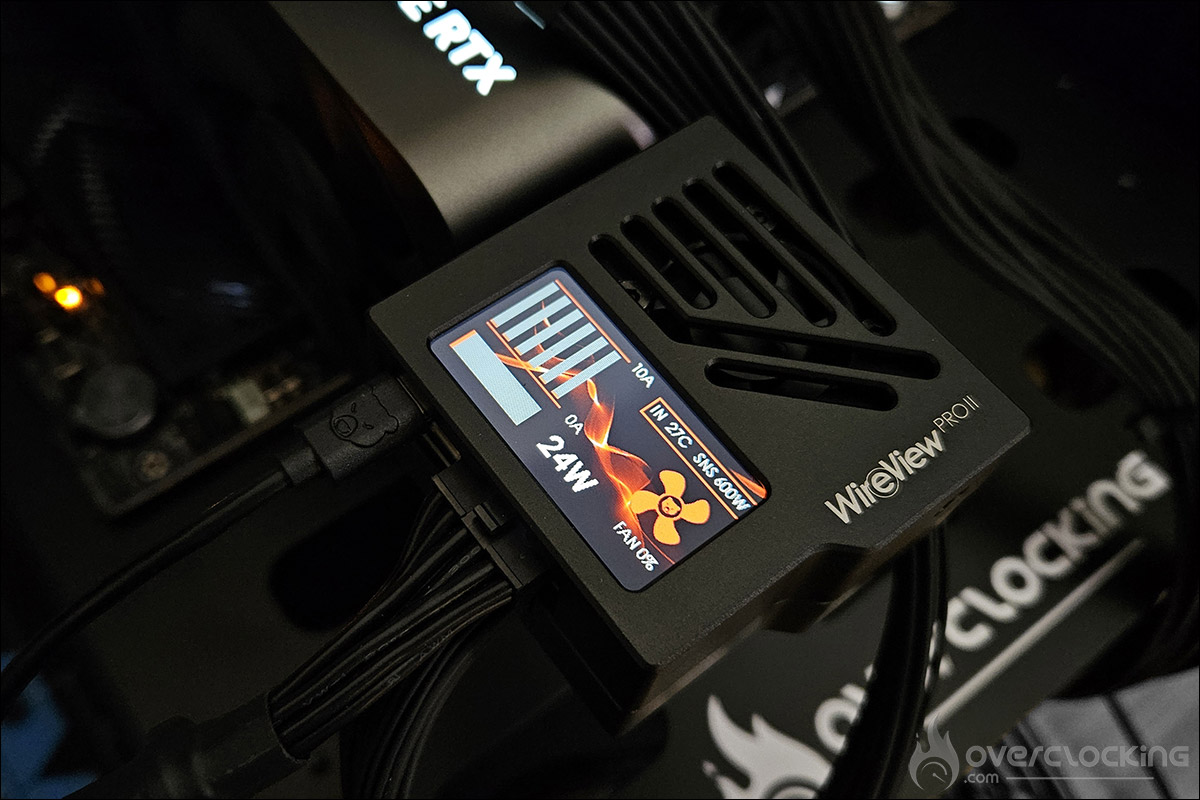
As for the display, there are no changes. It features a 320 × 170-pixel TFT IPS color screen. The button on the side lets you navigate through the various menus. All settings related to your graphics card’s safety—such as current (A), voltage (V), temperature (°C), and power consumption (W)—are continuously monitored. There are ventilation openings on the front panel to dissipate heat via a 30-mm fan.


Its purpose is to provide airflow to keep the power connector and power plug cool. The good news is that it doesn’t run continuously. It’s self-regulating, and its speed depends on the measured temperature.
Other Connectors:
Right next to the 12V-2×6 port is a USB Type-C port. Using the included 30 cm USB-C to USB 2.0 cable , you can connect your WireView PRO II to your motherboard. You’ll need this cable for updates and to use Thermal Grizzly’s software to configure your WireView PRO II. After that, it won’t be necessary to keep it connected at all times, since the various readings will be available directly on the color display. On the back, you can see the various holes that allow the module to be mounted on the brackets included in the bundle.


The two white connectors allow you to plug in the two temperature probes included in the bundle. The shorter one, measuring 5 cm, can be placed under the power connector, and the second one, measuring 20 cm, at the back of your graphics card’s PCB.
Finally, the last small connector allows you to connect your WireView PRO II to your motherboard. The Y-cable lets you connect one end to your motherboard and the other to the power button cable on your case. Your power button therefore remains functional, but the WireView PRO II is also capable of powering off your motherboard.
A semi-passive fan under the shroud:
Although it isn’t visible at first glance, a 30-mm fan is mounted under the shroud. It activates at 51 °C and runs at 10% of its maximum speed. After that, for every additional 3 °C, the speed increases by 10%. A quick calculation shows that it will reach maximum speed once the temperature exceeds 78 °C. We’ll see how noisy it is during our test.
An additional 2-year warranty:
Thermal Grizzly offers an extended warranty that may go beyond the statutory warranty and the manufacturer’s standard warranty. It will be extended if your graphics card is no longer covered by the manufacturer’s warranty. If damage occurs to the graphics card’s 12VHPWR or 12V-2×6 connector despite the built-in protection mechanisms, repairs will be carried out by Thermal Grizzly. The company commits to replacing the 12VHPWR or 12V-2×6 connector. However, if the graphics card is damaged beyond repair, Thermal Grizzly will provide you with an equivalent card. This protection also applies after the original graphics card’s warranty has expired, up to two years following the purchase of the WireView PRO II. Of course, for the warranty to be valid, you must have retained the original protection settings—that is, the default settings. Remember that the module has internal memory that records the current settings.
To summarize:
- The extended warranty is valid for 24 months from the date of purchase of the WireView PRO II.
- All claims must be made upon presentation of proof of purchase (invoice).
- This extended warranty applies exclusively to the original purchaser of the WireView PRO II; it is therefore non-transferable.
Der8auer also explained in his video that the price increase for the WireView PRO II is intended to cover the cost of this extended warranty offered by Thermal Grizzly.
[nextpage title=”Installing the WireView Pro II Wired:”]
As we mentioned at the beginning of this article, the main advantage of this wired version is its perfect compatibility with most graphics cards currently on the market. We will therefore install the module on our NVIDIA RTX 5090 Founders Edition. The WireView PRO II Wired version allows you to mount the module either on the back of the graphics card or directly inside your case. Since we’re using a benchmarking bench , we chose to install it at the end of the RTX 5090.

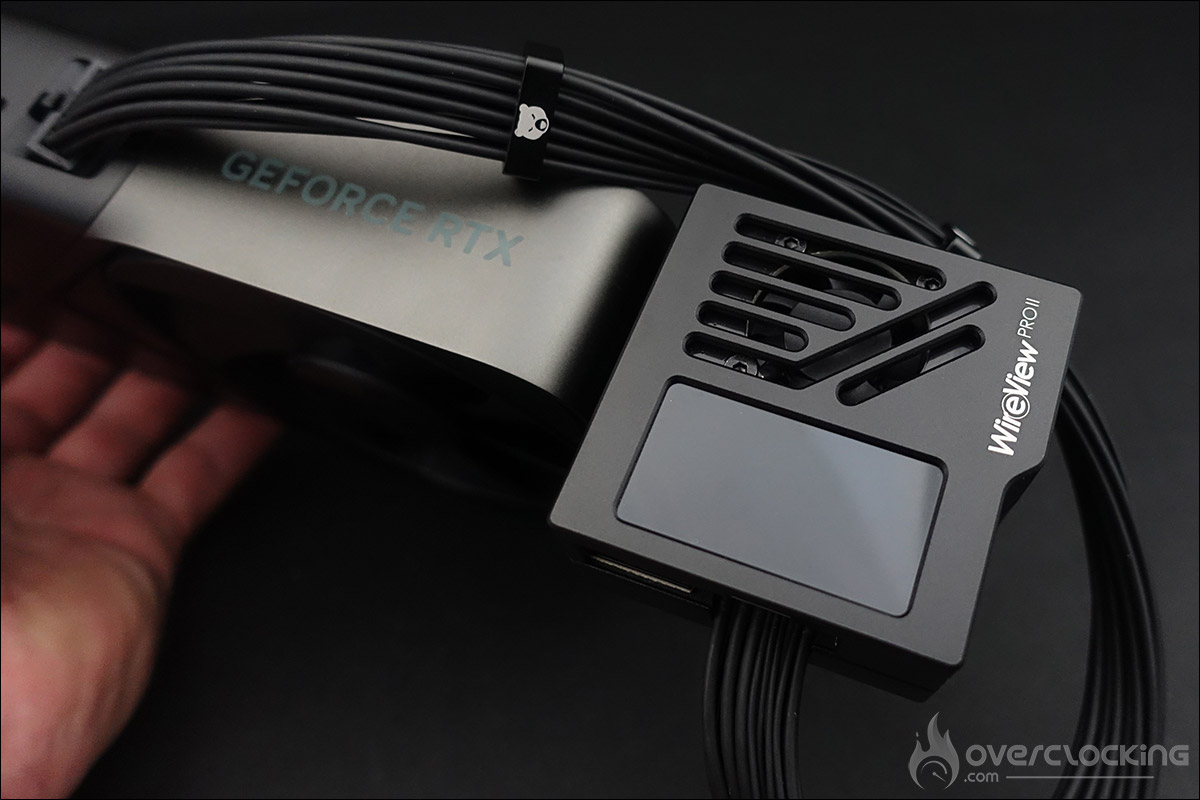
The WireView PRO II is primarily designed for RTX 5090 graphics cards, although it is compatible with any graphics card featuring a 12V-2×6 power connector, provided you choose the WireView PRO II model that matches your GPU. In fact, by default, its various safety settings are configured for the RTX 5090, which, in our view, is truly the model it’s designed for. Of course, you can use it with other RTX 50 series cards as well as the RTX 4090. You’ll simply need to adjust the safety settings in the software so that it functions properly and doesn’t default to the settings for an RTX 5090. If you do not adjust the current intensity setting, your WireView PRO II may not function at 100% capacity.

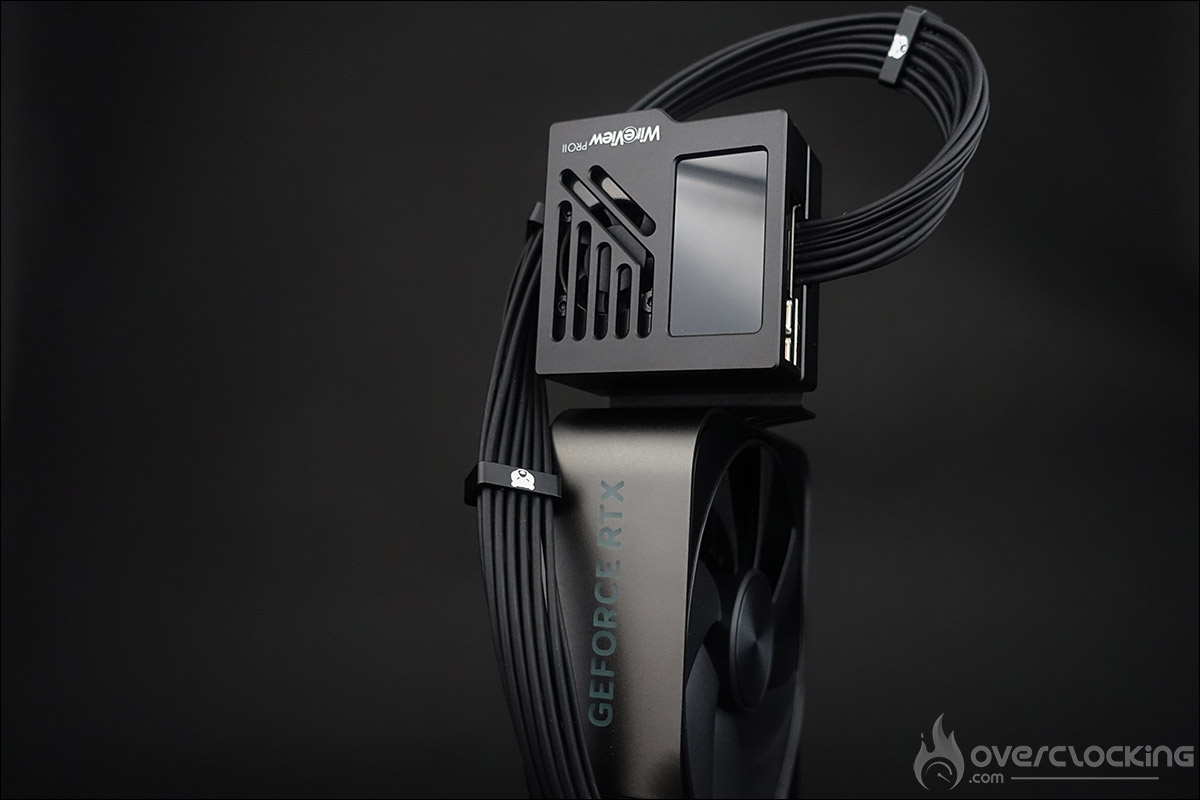
Thermal Grizzly has included all the tools needed for installation in the WireView PRO II Wired bundle. The first step is to remove the two small screws at the end of the Founders Edition to install the mount. New screws, compatible with the mount, are included in the hardware bag.
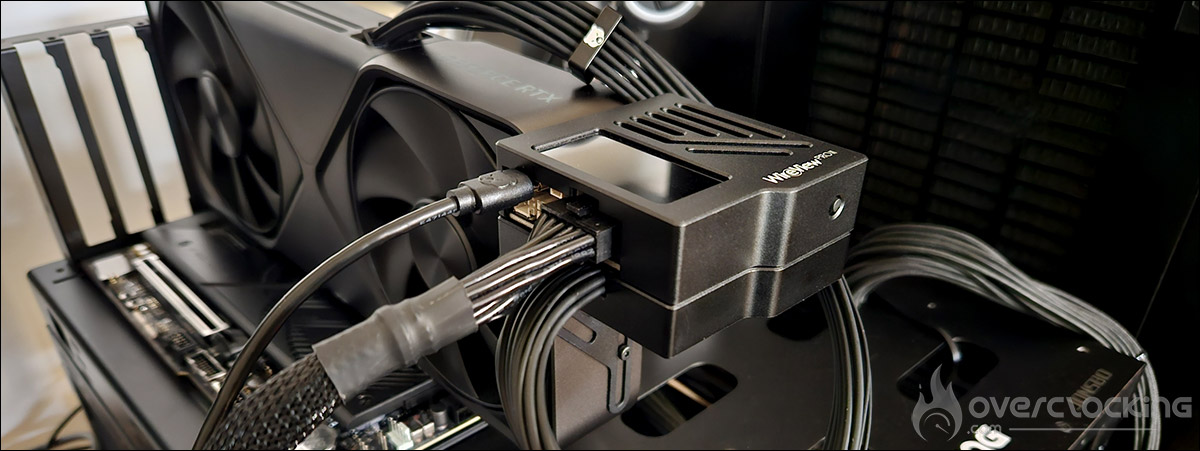
Now that the bracket is secured, we’ll install the module. As you can see, installation is very easy. Next, plug the WireView PRO II Wired’s power cable into the graphics card’s 12V-2×6 connector. Finally, power the module using the 12V-2×6 cable from your power supply. Don’t forget that to access your data or flash the firmware on your WireView PRO II, it must be connected to your motherboard via the USB-C to USB cable included in the bundle.
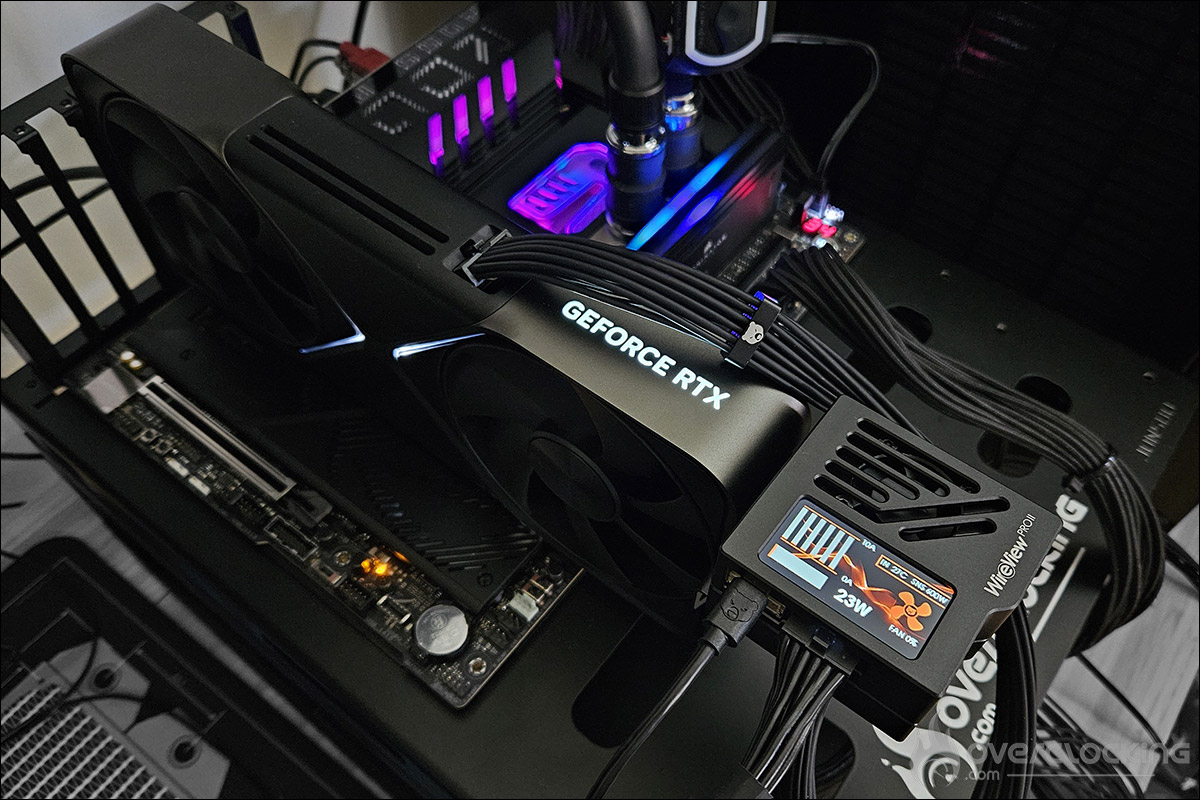

Let’s take a look at the WireView2 software, version 1.0.7!
[nextpage title=”The Thermal Grizzly software:”]
WireView 2 software, version 1.0.7:
The software initially went through a series of “beta” versions but now has an official release. Thermal Grizzly is actively working on its software; as of this writing, the software has evolved further and is now at version 1.0.7. Don’t forget that to access your data or flash the firmware on your WireView PRO II, it must be connected to your motherboard via the USB-C to USB cable included in the bundle.
We’ve already done that, so we’re going to go ahead and download the latest version of the software. There’s no need to flash the firmware on our WireView PRO II since the Thermal Grizzly team did that before sending us this unit. Note that Thermal Grizzly has just posted this video guide online to help you if needed.
Before updating your software, it’s very important to close the WireView2 application that’s currently running (check the taskbar) and make sure it isn’t set to start automatically. We hope Thermal Grizzly will soon offer updates that run directly from within the application.


Once the software is downloaded, run it. It opens immediately, and if you need to update the firmware, go to the “Device” tab on the left. As you can see, the firmware on my current model is version 05. Next, you’ll need to click “Enter Bootloader” and confirm. The first time—which is the case here—you’ll need to install the DFU driver. Once it’s installed, repeat the same steps, and you’ll then have access to “Update Firmware.” It’s completely normal for the screen to go black during the update.

You don’t need to do anything in particular; the software will start updating the firmware on its own. Here are a few screenshots of the software to show you what it offers. It has numerous settings that you can choose to enable or disable. The most interesting feature is, of course, the monitoring function. According to Der8auer, the WireView PRO II is capable of storing nearly a year’s worth of monitoring data.


It might be worth checking these logs from time to time to make sure the readings remain consistent. You can, of course, choose a dark background.
The main screen:
Let’s take a look at our WireView PRO II when it’s first powered on. Here’s a photo of what our WireView PRO II will display by default when it’s powered on.
Here’s the information displayed:
- Real-time power consumption via the power connector (18 watts), along with a bar graph showing these 18 watts out of 600 watts.
- Fan speed expressed as a percentage (0%).
- The maximum allowed power consumption (600 watts). The WireView PRO II can detect the cable and thus determine whether it is a 300-, 450-, or 600-watt model.
- The highest temperature measured across the two connectors (36 °C).
- The electrical current on the six lines. This current, expressed in amperes, is not very precise since the bar graph is not scaled.

Other default displays:
As we mentioned, the button on the side of the WireView PRO II lets you navigate through the different displays. In fact, you’ll find the same information available on the main screen, but in much greater detail:
1. Real-time power consumption via the power connector, the highest current, the average voltage, and the maximum temperature recorded on one of the two connectors.
2. The current on the six lines, but here with exact values that can also be recorded.


3. The temperature of the two connectors (input/output). Finally, you can connect two temperature probes, which are included in the bundle.
4. The firmware version of your WireView PRO II and configuration via the USB connector.


Configuration options:
You can configure your WireView PRO II without using the software. Press and hold the screen scroll button to access the menu (online guide). Here are the various settings available to you:
- The graph scale for electrical current: 5 A, 10 A (standard), 15 A, and 20 A.
- Maximum power consumption display: 300 W and 600 W (standard).
- Temperature source: cable input, cable output, external sensor 1, or external sensor 2.
- Whether to display in a loop or not—that is, to cycle through the three available screens.

- Fan control: auto (standard) or from 0 to 100%, in 10% increments
- Current limit per pin: 0.5 A to 20 A, with 10 A as the standard value.
- Total power consumption limit: 50 to 1,550 W, with 600 W as the default value.
- Temperature limit: 5 to 125 °C, with 80 °C as the default value.
- Timeout before the PC automatically shuts down: 1 to 250 seconds, with 10 seconds as the default.
- Shutdown button behavior: short or long press.
- Screen display theme: TG1 by default.

- Display rotation: 0 or 180°.
- Screen brightness: 10 to 100%.
- The interval between recordings.

Of course, you can reset all settings to their defaults and save any changes you’ve made. Finally, here are the three wallpapers currently available.


Time for some testing!
[nextpage title=”WireView PRO II Review:”]
Of course, aside from the inclusion of the 40 cm cable, the wired version of the WireView PRO II works the same way as the other two models: the Normal and Reversed models. So we won’t be repeating the entire battery of tests, but will instead use the results from our previous test with the ZOTAC RTX 5090 AMP Extreme Infinity graphics card. The tests and screenshots are similar across all three available models.
WireView PRO II Alarm Test:
The purpose of this part of the testing is to see how the WireView PRO II performs under loads placed on our GPU. Of course—and you’ll understand this perfectly—we’re not going to risk improperly clipping the power connector just to verify whether Thermal Grizzly’s safety feature works flawlessly. However, to test the alarm, we intentionally reduced the current from 10 A to 5 A. Head to the settings to change the value. Note that this adjustment must be made within the menu by selecting the limit.


We ran a test using Geeks3D FurMark, knowing full well that our RTX 5090 would far exceed 5 A. After 10 seconds of the current exceeding the limit, the alarm triggered. If we had connected the Y-connector to our motherboard, the system would have shut down automatically to protect our graphics card.


As Der8auer also points out, if the alarm were to go off under “normal” conditions, the issue could stem from several sources. The power connector might not be properly seated, or the power connector cables could be the problem. Sometimes, simply pushing them back in causes the readings to return to normal. He noticed that there could be significant differences in current if one of the cables wasn’t fully seated. This is therefore something to keep in mind.
The various readings from the WireView PRO II:
But beyond this series of tests, we’ll also be able to assess the current on the six lines of our connector. Der8auer highlighted something very interesting in his WireView PRO II demo video by pointing out an issue he encountered with his ROG RTX 5090 ASTRAL. By following this link, he demonstrates that the current isn’t consistent across all lines. As we mentioned above, be sure to check that the cables are fully inserted all the way.
For our part, we used Geeks3D FurMark to stress-test our ZOTAC RTX 5090 AMP Extreme Infinity. The idea is to verify the advertised values by comparing them to those recorded in GPU-Z and in MSI Center for our MPG Ai1600TS power supply.

Overall, the readings are fairly close, even though they update more quickly in the WireView 2 app. The good news is that the power connector delivers balanced current across all six lines. We ran FurMark for nearly 20 minutes without encountering any issues. The WireView PRO II’s fan kicked in, as expected, during this test, running at 30% of its maximum speed. Here are two more screenshots of the software showing the monitoring interface and the various values that can be recorded.


Our ZOTAC RTX 5090 AMP Extreme Infinity, paired with our MSI MPG Ai1600TS power supply and the Thermal Grizzly WireView PRO II, work in perfect harmony!
[nextpage title=”Our Impressions:”]
Our impressions:
Our opinion hasn’t changed at all since we tested the WireView PRO II Reversed version. This tool is exceptionally reliable, and this wired version is, without a doubt, even more impressive! As we said before, this is by no means just a gimmick!
Is it worth buying? Our answer is a bit more nuanced. When you consider the price of an RTX 5090, however, an extra hundred euros doesn’t seem at all excessive to minimize the risks. Furthermore—and this is just my personal opinion—if your case has a glass panel, the WireView PRO II looks great, and the display of various information is very interesting. As a reminder, by default, the WireView PRO II is designed to be installed on an RTX 5090. If that’s not the case for you, it’s worth lowering the safety settings to fully protect your graphics card. That’s why we wanted to qualify our answer regarding whether it’s necessary to buy it. If you have an RTX 5090, it’s a perfectly logical purchase, but it becomes less so for lower-end models. We’re not saying it’s unnecessary, but it will be particularly useful for high-end models.
The main advantage of the “Wired” version is the ability to place the module either at the end of your graphics card or inside your case. This will make it easier to hide the various cables (sensors, USB cable, and Y-cable) if you’re a fan of cable management. The price is slightly higher than the other two versions—149.90 euros—but aside from the cost, it’s a shame that this 12V-2×6 connector requires careful handling during use.
A quick note also about the included mounting brackets, which let you position your WireView PRO II Wired in a variety of locations inside your case, on a fan, or at the end of your graphics card itself. Thermal Grizzly goes the extra mile by including three cable ties on the power cable to make it easier to hide, as well as to improve its appearance.

 As you can see, our opinion hasn’t changed, but this wired version seems the most appealing to us. The 12V-2×6 connector remains the Achilles’ heel of graphics cards that use it, so the WireView PRO II is the perfect tool for peace of mind—ensuring, in particular, that the current is consistent across your various cables.
Once again, thank you to Thermal Grizzly for providing us with this review unit. In addition to the “Gold” award we gave it in our first review, we’re awarding this wired version our “Editor’s Choice” award, as well as our “Favorite” award.

