
[nextpage title=”Introduction:”] Today marks the end of the NDA for the new high-end “Threadripper” series processors based on ZEN 5. In November 2023, we already had the opportunity to review the Threadripper 7980X and 7970X, so today we’ll be able to judge the gains made by this new generation. AMD confirmed the existence of Threadripper ZEN 5 at Computex 2025. There will be two distinct series, with the PRO series, the 9000WX and the 9000 series, aimed at the HEDT market, which we could call “high-end desktop processors”. As we said, it’s in this second series that we received two Threadripper models, the 64-core 9980X and the 32-core 9970X.
And to make life easier for us, AMD made other components available to us so that we could test this series of processors in the best possible conditions. We also received an ASUS Pro WS TRX50-Sage Wi-Fi motherboard, a G.SKill ZETA R5 NEO EXPO kit with 128 GB at 6400 MT/s and a Silverstone XE360-TR5 cooling system.
See this post on Instagram
[nextpage title=”AMD Ryzen Threadripper 9980X and 9970X:”] Let’s start with the presentation of the two stars of the day, the AMD Ryzen Threadripper 9980X and the AMD Ryzen Threadripper 9970X. These are the boxed versions we’ve received, with a dress code that’s very much in the spirit of AMD, with orange and gray accents. For the PRO versions, the color code should be gray and silver. None of these processors comes with a bundled cooling solution . This is quite logical, since it will be necessary to opt for AIO-type cooling as advised by AMD to keep them nice and cool, or to opt for a custom cooling loop, as will be the case in our test.
Threadripper 9000X (non PRO):
The AMD Ryzen Threadripper 9000X range currently comprises three processors with 24, 32 and 64 cores. The Threadripper 9000X processors will have a maximum of 8 CCDs, while the PRO models will have a maximum of 12. As we said in the introduction, the consumer AMD Ryzen Threadripper range will include versions 9980X, 9970X and 9960X.


The top-of-the-range model, the Ryzen Threadripper 9980X, features 64 cores and 128 threads, a 256 MB L3 cache, a 64 MB L2 cache and a TDP of 350 watts. Boost frequency is up to 5.4 GHz. Our other sample, the Ryzen Treadripper 9970X, features 32 cores and 64 threads. The L3 cache is 128 MB, the L2 cache 32 MB, but with a TDP of 350 watts. As for its Boost frequency, it can reach 5.4 GHz.


In the box, at the rear of the processor and well protected in a foam block, we find the orange tool needed to unlock the sTR5 socket on Ryzen Threadripper-compatible motherboards. The other element is a support for the Asetek waterblocks/pump. The Ryzen Threadripper processor is slid into an orange plastic holder. As we’ll see when installing the processor in the socket of the ASUS Pro WS TRX50-Sage Wi-Fi, this is a very important component.


As far as prices are concerned, AMD has announced a price of $4,999 for the Ryzen Threadripper 9980X and $2,499 for the Ryzen Threadripper 9970X. Good news, since the prices of these Threadripper 9000X are identical to those of the 7000X generation. As you’ll have gathered, we’re not at all in the same price bracket as the processors we usually test


.
Chipset: no change!
Despite the arrival of this new generation of Threadripper, AMD has kept the same socket, the sTR5, as well as the chipsets already available for the previous generation. The first, the WRX90, is clearly aimed at professionals, while the TRX50 will accommodate non-pro Threadrippers, but not only! In fact, the sTR5 socket on TRX50 motherboards can also accommodate PRO CPUs.


Now let’s take a look at the components we received from AMD France for this test.
[nextpage title=”The ASUS Pro WS TRX50-Sage WiFi:”] As we said in the introduction, we received a copy of the ASUS Pro WS TRX50-Sage WiFi motherboard. Until recently, it was the only board in the ASUS catalog built around this chipset . ASUS has just added a new model, virtually identical, but labelled ASUS Pro WS TRX50-Sage WiFi A. This model features a different layout but, above all, should be more affordable.
The bundle:
A quick look at the bundle of this ASUS Pro WS TRX50-Sage WiFi to see if it benefits from “special accessories”. As this is a motherboard intended for professional desktop PCs, the bundle should be reduced and different from what we’re used to finding on consumer boards


Finally, we find a fairly classic bundle reduced to its simplest expression, with SATA cables, Q-connector and a quick installation guide.
W790 architecture and chipset:
This ASUS Pro WS TRX50-Sage Wi-Fi is built around the AMD TRX50 chipset. It features a new sTR5 socket. As you’ll see, the socket size is larger than what we’re used to seeing, particularly with the current AM5 socket on consumer motherboards. This socket remains unchanged and corresponds to the one we already used to test the AMD Ryzen Threadripper 7000X generation.


What’s most striking are the imposing radiators on the top of the motherboard. In fact, this is a common feature of the various motherboards announced by the brands for this TRX50 chipset. It therefore seems necessary to be able to dissipate the heat from the power supply stages efficiently. The TRX50 chipset naturally supports PCIe 5.0, offering higher storage performance than the previous generation, as well as DDR5 support. Speaking of DDR5, the TRX50 chipset supports a maximum of 4 memory slots, compared with 8 for the WRX90. ASUS does not yet specify memory support on its website, but you should know that we’re not talking about DDR5 kits as we’re used to, but DDR5 RDIMM(Registered DIMM).
The various heat sinks :
The board’s dimensions are 305 mm x 280 mm, corresponding to the CEB format. If you acquire this motherboard, don’t forget to check that your case is compatible with this format, otherwise you’ll have to leave it sitting on its box. The dominant color on the PCB is black, but this contrasts with the two metallic-grey heat sinks. ASUS has chosen to keep the color neutral. The design is rather unusual in that the memory slots are above and below the socket, whereas if you remember the ROG Zenith II Extreme TRX40 board, the memory slots were on the left and right of the processor.


Let’s start with the radiators, of which there are four, yes, that’s right! First of all, the two imposing radiators on either side of the socket, covering the power supply stages. The third, which joins this duo via a heatpipe, is also responsible for cooling some of the components in the power supply stage. We’ll have a better idea of the PCB’s design once we’ve removed the various heat sinks


Oh, but what a surprise: in reality, the two metallized plates conceal two 40 mm fans responsible for keeping the power supply stages cool. At first glance, we might have thought the board was entirely passive, but that’s not the case at all.


Last but not least, the fourth one covers the chipset – more on this later in the article. The height is low, so that graphics cards can be easily inserted.
The socket and PCIe :
The space around the socket is quite limited, which is quite logical given its size and the various heat sinks that surround it. This ASUS Pro WS TRX50-Sage Wi-Fi can accommodate a maximum of four DDR5 memory modules. Unfortunately, we have no information on the specifications of these slots. What we can say is that the kit we received for testing is a 128 GB, 6400 MT/s G.SKill ZETA R5 EXPO


There are no less than five PCIe slots: three are 5.0 16x and two are 4.0 16x. To power all this, the board has two 24-pin and four 8-pin connectors. This means you can connect up to two power supplies if required. Please note that AMD recommends a minimum power supply of 1,200 watts for the Threadripper 9980X, or 1,500 watts if you’re using a high-end graphics card


Some of the power connectors are covered, so as not to confuse them with those that need to be powered if you’re only using one power supply!
Three M.2 SSD slots:
The first M.2 SSD slot is located beneath the two PCIe 5.0 x4 ports. The other two, more difficult to locate, are actually under the radiator covering the chipset. The two M.2 5.0 x4 SSDs are 2242/2260/2280 compatible, while the third, 4.0 x4, can accommodate the 2280 format.

All M.2 SSD slots are equipped with thermal pads, and all feature the quick-clamping system already present on a large part of the mainstream motherboard range.
Clocker tools :
Let’s start with the elements inserted on the PCB, which can prove to be interesting tools for overclockers. There are quite a few on this model, which is perhaps surprising on this type of motherboard. This confirms Asus’ desire to offer a professional board with overclocking tools.
- The power button: powers up the motherboard.
- Flex KEY (reset): restarts the motherboard in the event of failure. The button can now be assigned to another task, such as Safe Boot or disabling the backlight.
- Safe Boot: allows the board to be rebooted even if the settings in the bios do not allow boot. This avoids having to perform a CMOS Clear to reboot and thus lose your encoded parameters.
- ReTry Button: when testing in cold conditions, sometimes the OS freezes and a reset can’t restart the motherboard: the only solution is to hold down the START button for 6 or 7 seconds. The ReTry button restarts immediately.
- LN2 jumper: enables LN2 profiles in the BIOS.


- Q-LED: 4 LEDs (CPU – DRAM – VGA – BOOT) to diagnose errors when the board is booted . The one that stays lit corresponds to the problem.
- Q-Code: displays a code corresponding to the component responsible for the boot error. This is now displayed on the OLED screen, and the list of codes can be found in the manual.
- CMOS CLR: clears BIOS settings to return to default.


- ProbeIT: measures voltages with a multimeter directly on the PCB.
- Slow Mode: allows you to boot with a coefficient of 16x, and once in the OS to reset the coefficient chosen in the bios. Mainly for max screens.
- RSVD: when activated under cold conditions (-120°C), prevents cold boot bugs.
PCB:
Our ASUS Pro WS TRX50-Sage Wi-Fi is based on an 18×2 (vcore) + 3 (vdd11) + 4 (vddio ) + 4-phase (vsoc ) power supply . This is the motherboard with the largest power supply stages we’ve ever had! The part in charge of the CPU is made up of 36 phases, but actually uses a new organization called “Teamed”.


The mosfets, Infineon PMC41430, in the power stages generate the most heat, as they are responsible for voltage conversion and delivery to the CPU from the 12-volt EPS connector. The board features two Digi+ ASP2205 controllers on the rear of the PCB for the vcore phases . These are the same controllers used on the ROG Crosshair X670E Gene. It will therefore be necessary to keep them cool via the imposing heat sinks that equip this ASUS Pro WS TRX50-Sage Wi-Fi.
Connections:
The rear panel features the following elements. First of all, the Clear CMOS and the button for flashing the BIOS from a USB key.

In terms of USB ports, this ASUS Pro WS TRX50-Sage Wi-Fi is equipped with two USB 2.0, six USB 3.2 Gen 2 type A and one USB 3.2 Gen 2×2 type C ports. There are also two Ethernet ports, one Intel 10Gb and one 2.5Gb. Last but not least, there are audio outputs and support for Wi-FI 7. nextpage title=”Other components in the AMD kit:”] In order to test these new Ryzen Threadripper processors to the full, AMD has provided us with a number of other components. Of course, the ASUS Pro WS TRX50-Sage WiFi motherboard we’ve just presented to you, but also a G.SKill ZETA R5 NEO EXPO kit with 128 GB at 6400 MT/s and a Silverstone XE360-TR5 cooling system.
G.SKill T5 NEO EXPO 128 GB at 6400 MT/s CL32 :
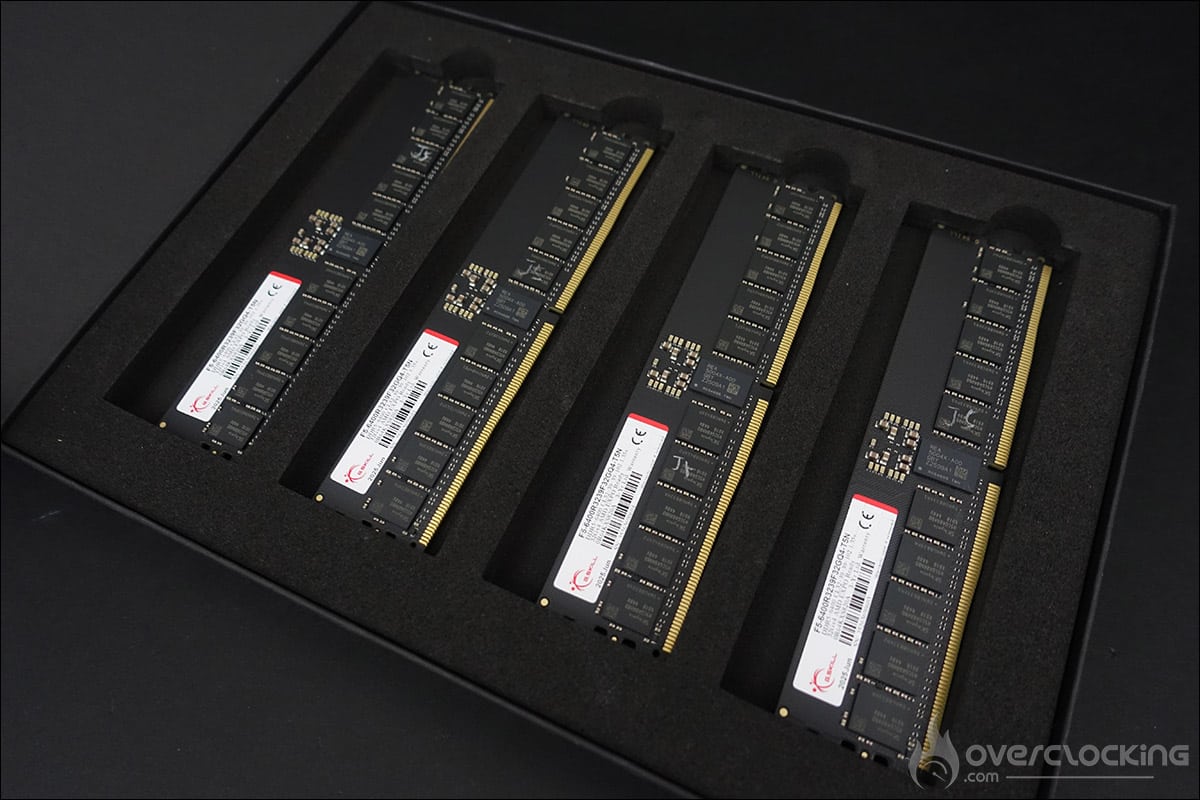
The G.SKill kit is a high-end kit with 128 GB capacity. It differs slightly from the one we received for the previous generation. As you can see from the photos, this kit consists of 4 DDR5 memory sticks, each with 32 GB. As usual, GSKill takes great care with the packaging, and thanks to pre-cut foam pieces, your kit will arrive at your home in complete peace of mind. Please note that these are R-DIMM models and will therefore not be compatible with consumer motherboards
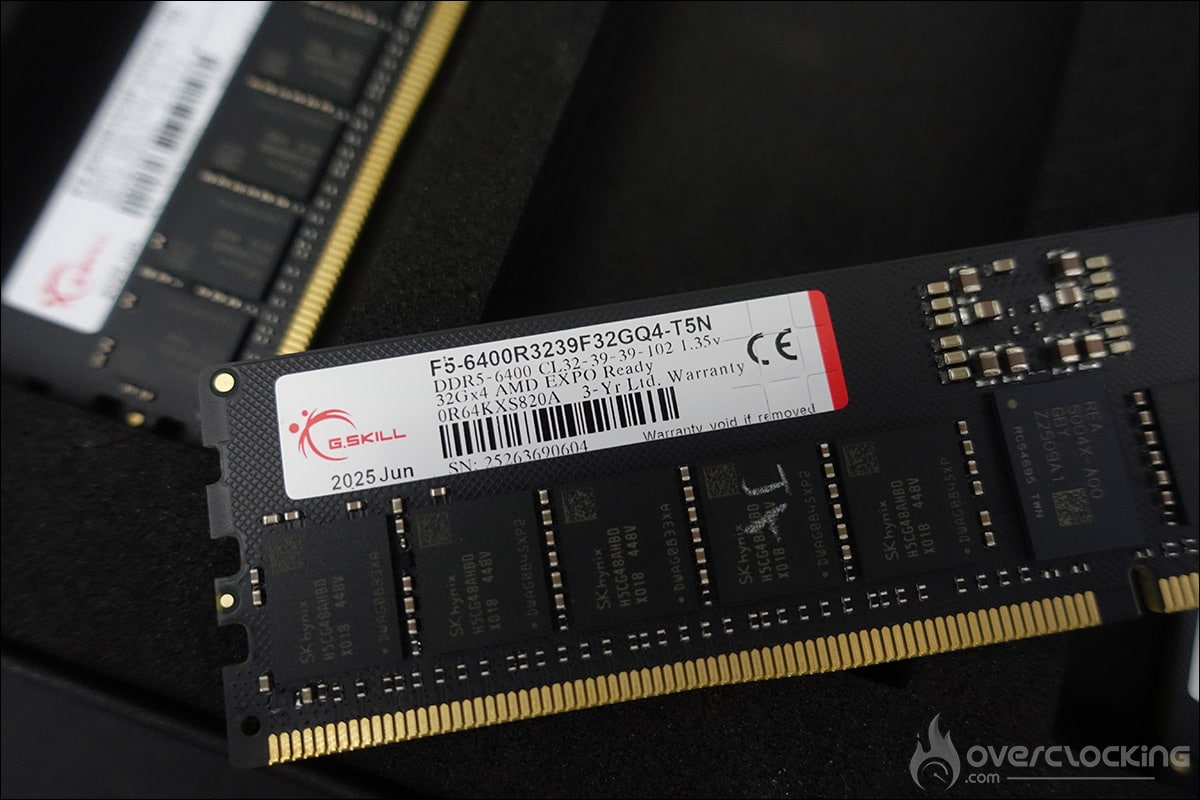
Our kit is clocked at 6400 MT/s with timings of 32-39-39-102, requiring a voltage of 1.35 volts to operate. As you can see, the finish is very basic, as there are no heatsinks on the PCB. We can also see the chips, which bear the SKhynix reference H5CG48AHB0
We don’t yet know the price of this kit, but it’s already listed on the brand’s website with a dedicated page.
The Silverstone XE360-TR5:
The cooling system supplied to us is the Silverstone XE360-TR5, with a 360 mm radiator. We’ll see whether we use this cooling system or our Alphacool XPX Aurora PRO sTR4/sTR5 waterblock in full black finish, combined with Alphacool’s Eiszeit 2000 chiller.
[nextpage title=”Setting up the test configuration: “]
Here’s a list of the various components that equip our test platform. For the publication of these tests, I used the latest BIOS received directly from AMD, version 0506. The motherboard is not a mass-market model, and BIOS updates are a little less frequent than on the motherboards we’re used to reviewing. Nevertheless, ASUS has provided us with several BIOSes to test this motherboard.
- Motherboard: ASUS Pro WS TRX50-Sage Wi-Fi (BIOS 9942/1203)
- Processor: AMD Ryzen Threadripper 9980X and 9970X
- Memory: 128 GB Zeta R5 NEO DDR5-6400 CL32
- Graphics card: MSI GT710
- Cooling system: Alphacool XPX Aurora PRO waterblock + Alphacool Eiszeit 2000 chiller
- SSD: Western Digital SN850 NVMe SSD M.2
- Power supply: be quiet! Dark Power PRO 12 1500w
- Operating system: Windows 11 64-bit
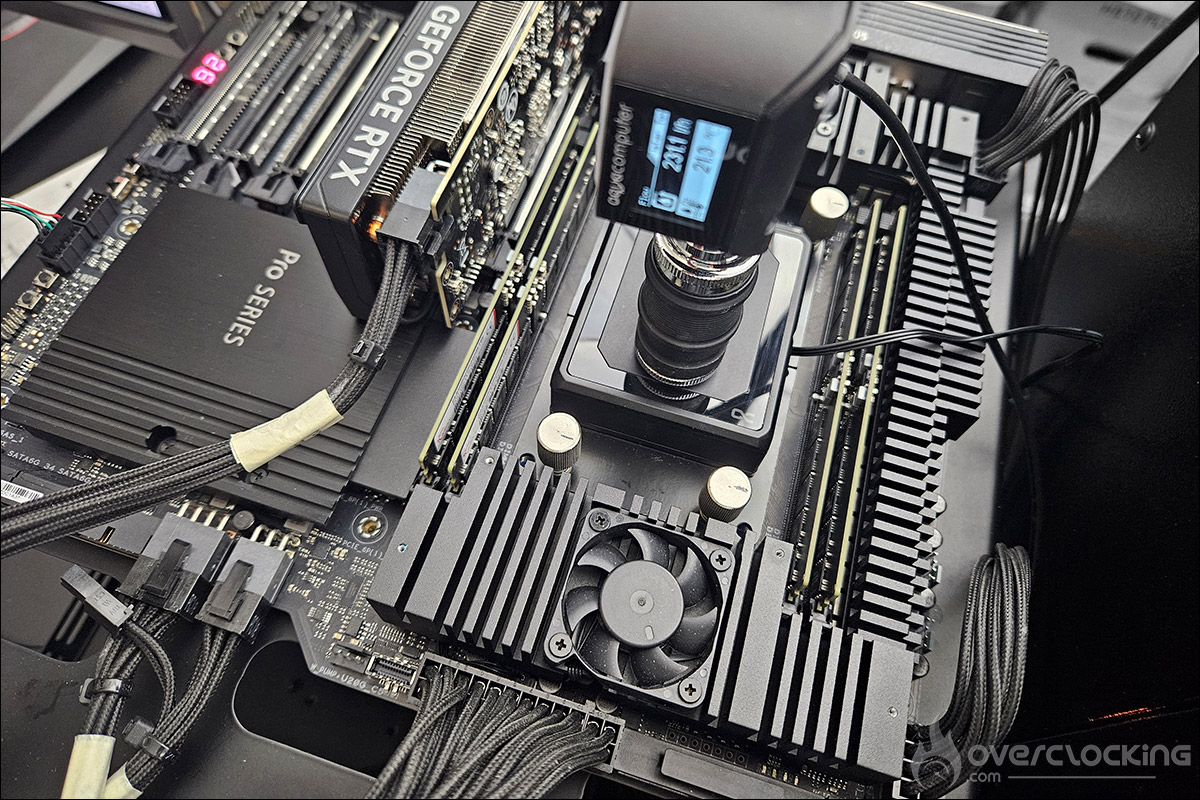
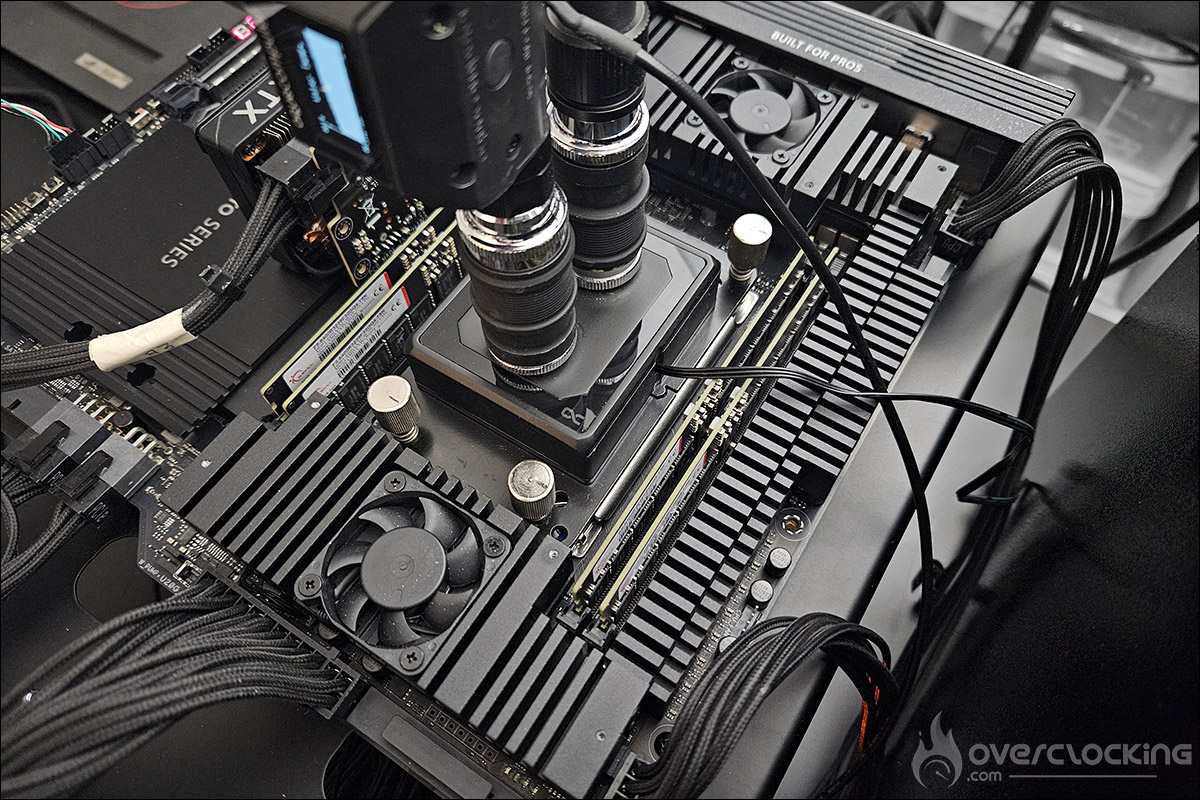
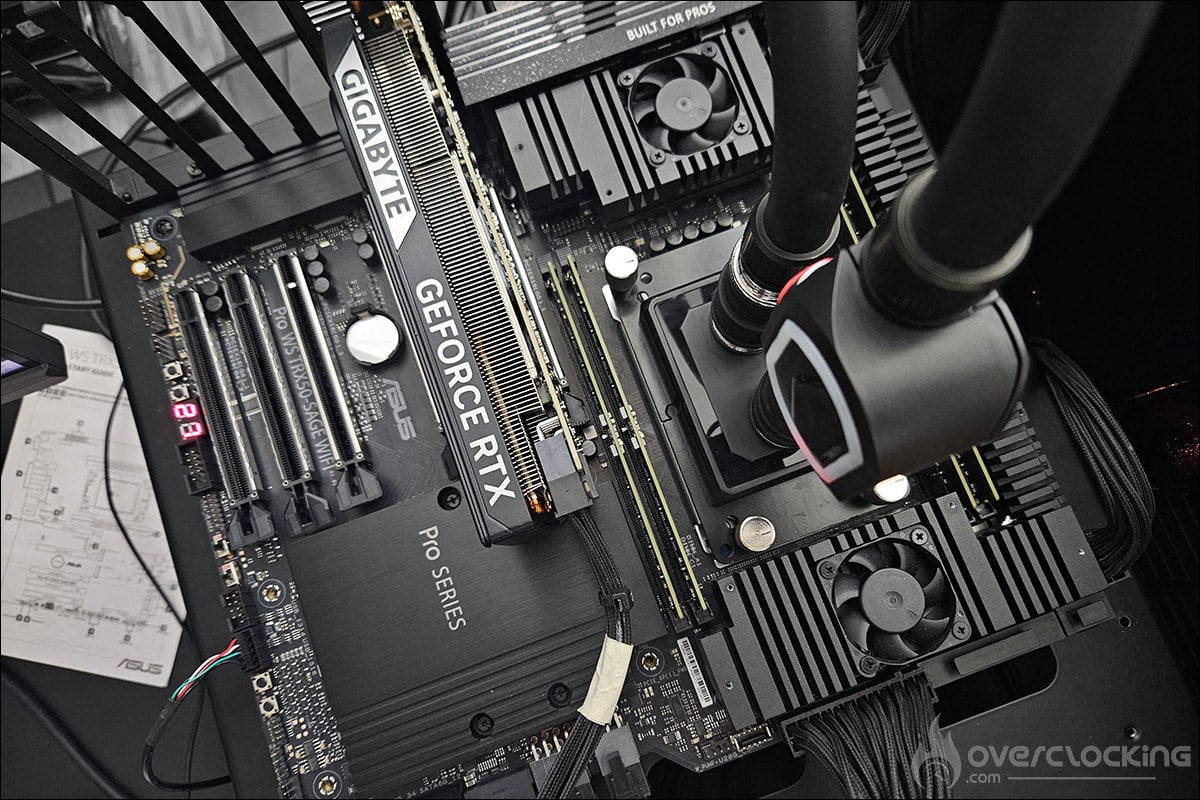
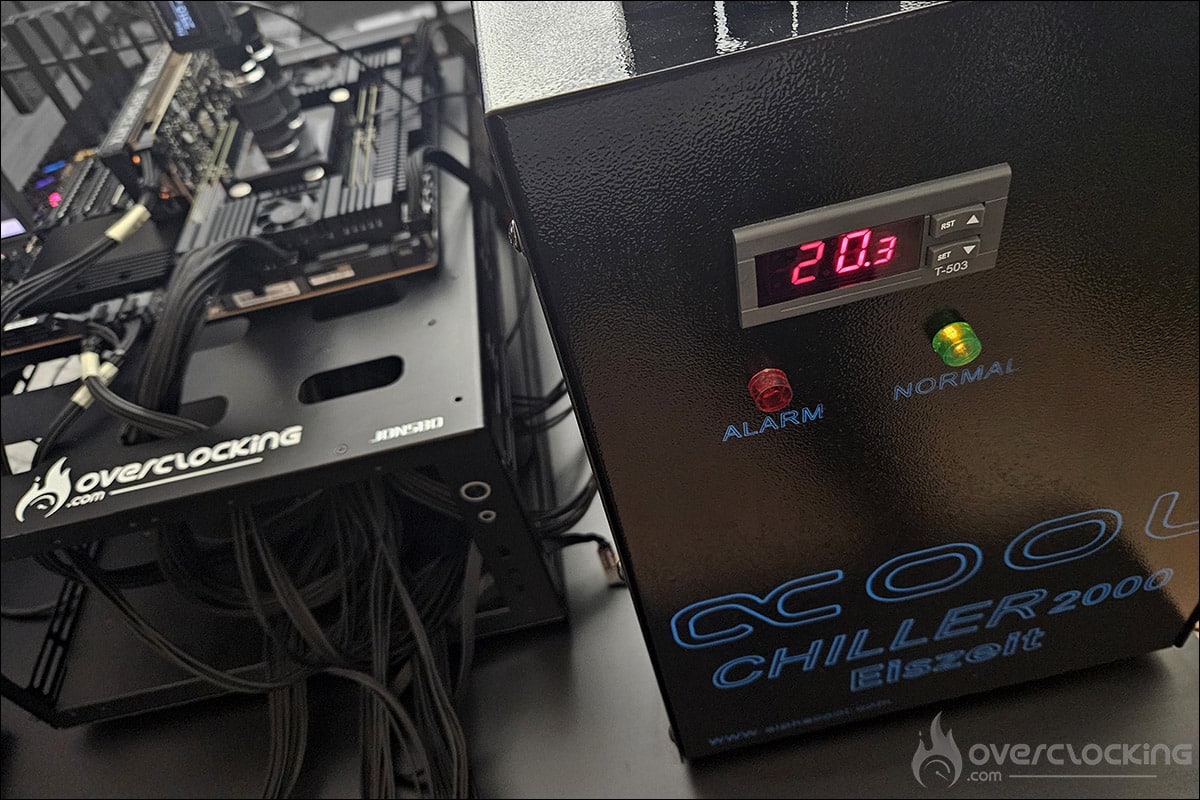
Installing AMD Ryzen Threadripper processors:
As you may have noticed from the motherboard presentation, the sTR5 socket on our ASUS Pro WS TRX50-Sage Wi-Fi is very different from what we’re used to seeing on mainstream motherboards. It does, however, resemble socket sTR4, and the installation procedure is identical. The first step is to open the socket using the tool provided with the Ryzen Threadripper processor. Just look at the order in which you loosen the socket, i.e. 3-2-1. Each nut is numbered


Once the three screws have been loosened, simply lift the retaining frame. Next, a second frame is raised, into which a protective plastic cover is slid. Below this, a second protective cover is fitted to prevent damage to the socket pins


Our Ryzen Threadripper processor is inserted into an orange plastic frame as soon as it comes out of the box. As you can see, we’re going to place our processor in place of the protective plastic frame. If the frame is correctly installed, when you place it on the socket, it will hold in place


Once in place, tighten the three nuts in reverse order, i.e. 1-2-3. That’s it, our Ryzen Threadripper 9980X is in place, all we have to do now is brush it with Noctua NH1 thermal paste and install our waterblock.nextpage title=”The BIOS of our ASUS motherboard: “] As far as the BIOS is concerned, at first glance we might be a little confused, because if we’re used to ASUS BIOSes but from the ROG series, here we have the impression of going back twenty years in terms of design. But don’t panic, after a quick glance, it’s very easy to find your way around, even if some options are specific to Ryzen Threadripper models. Before we start, we’d like to remind you that it’s essential to regularly update your BIOS, even on this type of motherboard. What’s more, the ASUS team regularly offers BIOS patches, so it would be a shame not to take advantage of them. You can also save your BIOS or profiles on a USB key. This will enable you to reload them after a BIOS update, should you decide to keep certain profiles, notably those dedicated to CPU or memory overclocking.


Despite the cruder design, you’ll find all the options you need, including those for overclocking the processor and memory kit. Don’t forget to activate the memory profile in the BIOS, as this is not done automatically


You’ll also find the “AI Tweaker” tab, which lets you choose the level of Load-Line Calibration, which we’ll talk about in the overclockingsection.


Our Ryzen Threadripper 9980X has an SP value in the BIOS, but as you’ll have gathered, the screenshots used to highlight the BIOS options are those with the Ryzen 7980X. The BIOS parameters have not changed since our previous test. The various voltages are all present in order to push the processor and memory kit


ASUS offers the possibility of using the “AMD Overclocking” option, although we personally prefer to use our settings manually. The BIOS also includes a tool for updating your BIOS. Remember that it’s often essential to flash the latest version of a BIOS, as it contains numerous patches and often improves performance. Let’s move on to the testing of this extraordinary configuration: [nextpage title=”Our test results:”] This is the part that will interest us most, enabling us to assess the performance of this ultra-high-end configuration from AMD. As a reminder, our copy of the Ryzen Treadripper 9980X is equipped with 64 cores/128 threads, and the Treadripper 9970X with 32 cores/64 threads. We’ve gone back to our usual tests and added the performance of this processor at stock, i.e. without any overclocking.Before we start, you should know that the card takes an extremely long time to start up for the first time! We even thought for a moment that we’d made a bad assembly, but we just had to be patient. The same applies to CMOS clear. The loading time can take from 3 to 5 minutes. Once the BIOS parameters have been set, entry into the OS takes just ten seconds.
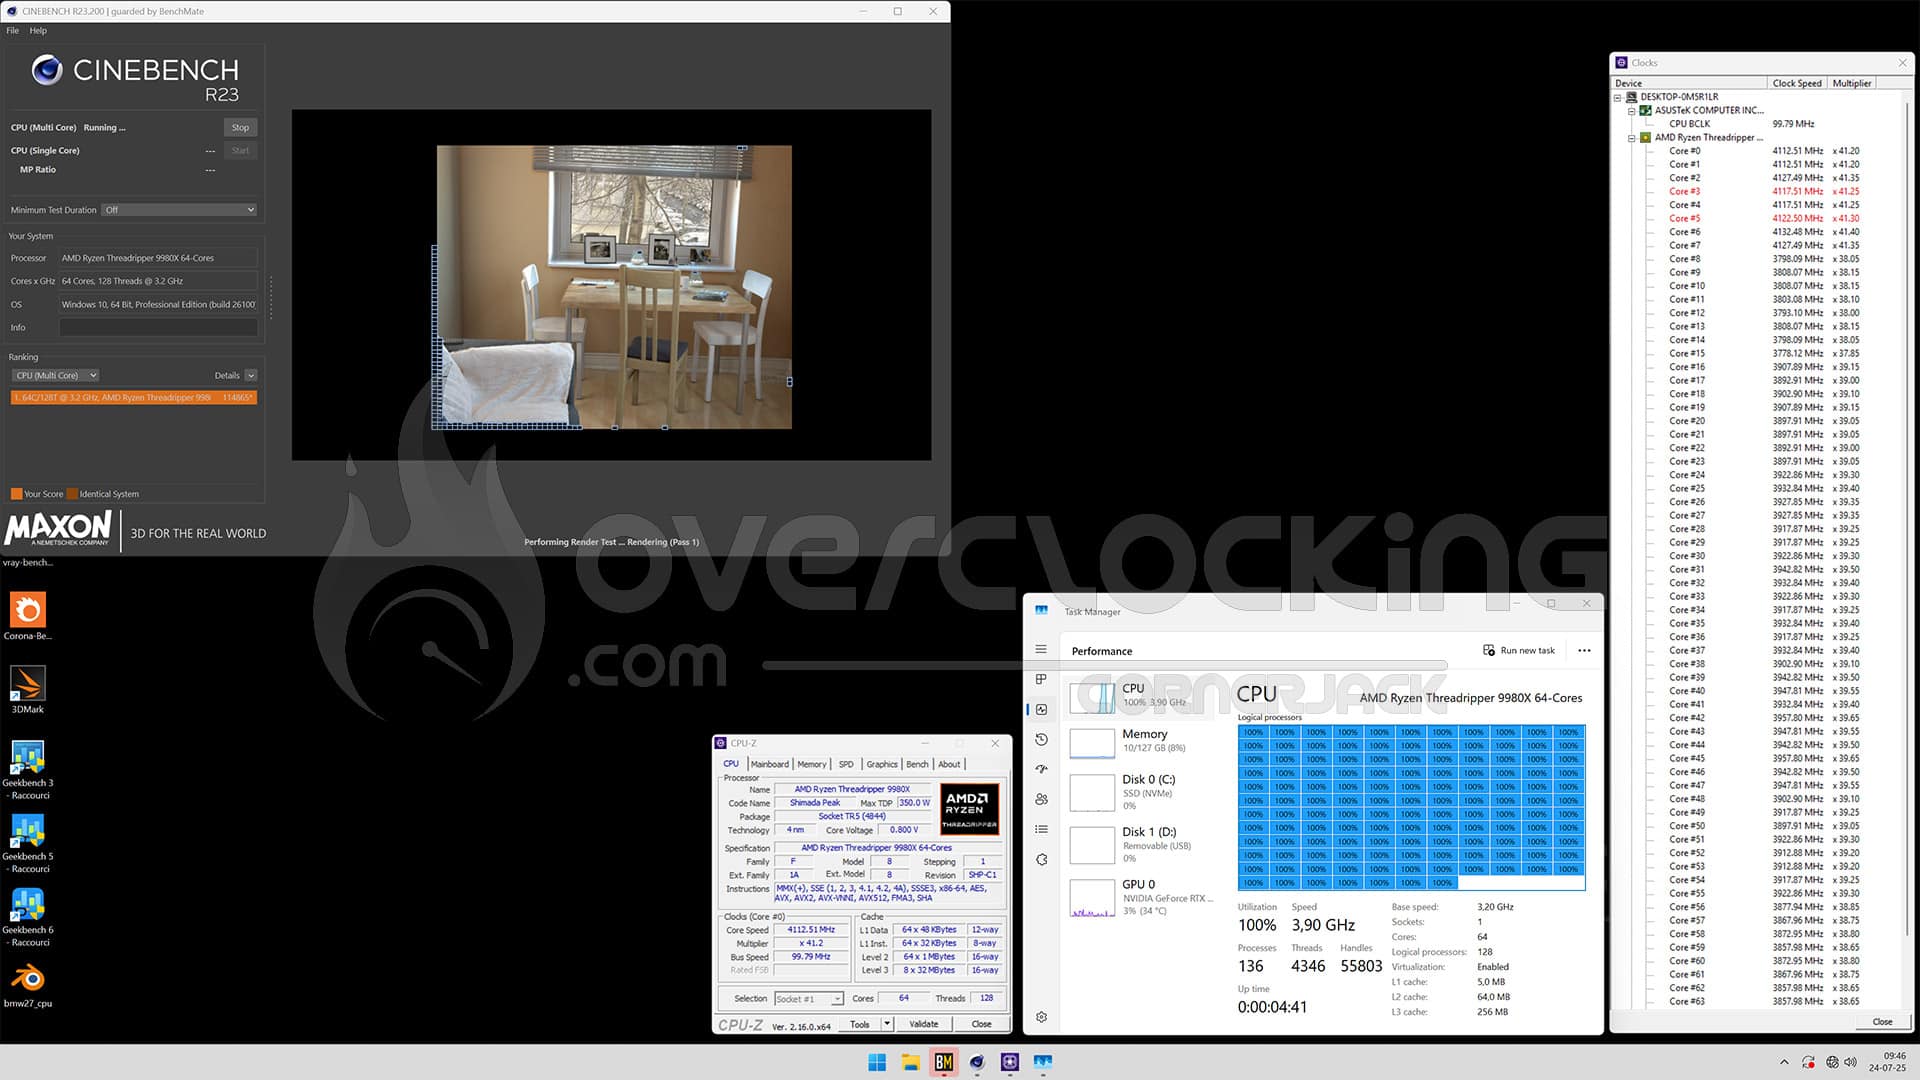
Reached frequencies and core activity for the 9980X?
The idea is to see if the frequencies announced by AMD are indeed reached, but also and above all if, during a multithreaded task, all the cores are in action. We can see that in a Cinebench R23 benchmark, in multi-core mode, the 64 cores of our 9980X are at 100% of their capacity. The frequency on the first 8 cores is slightly higher, at 4125 MHz, and on the other cores, between 3800 and 3950 MHz.
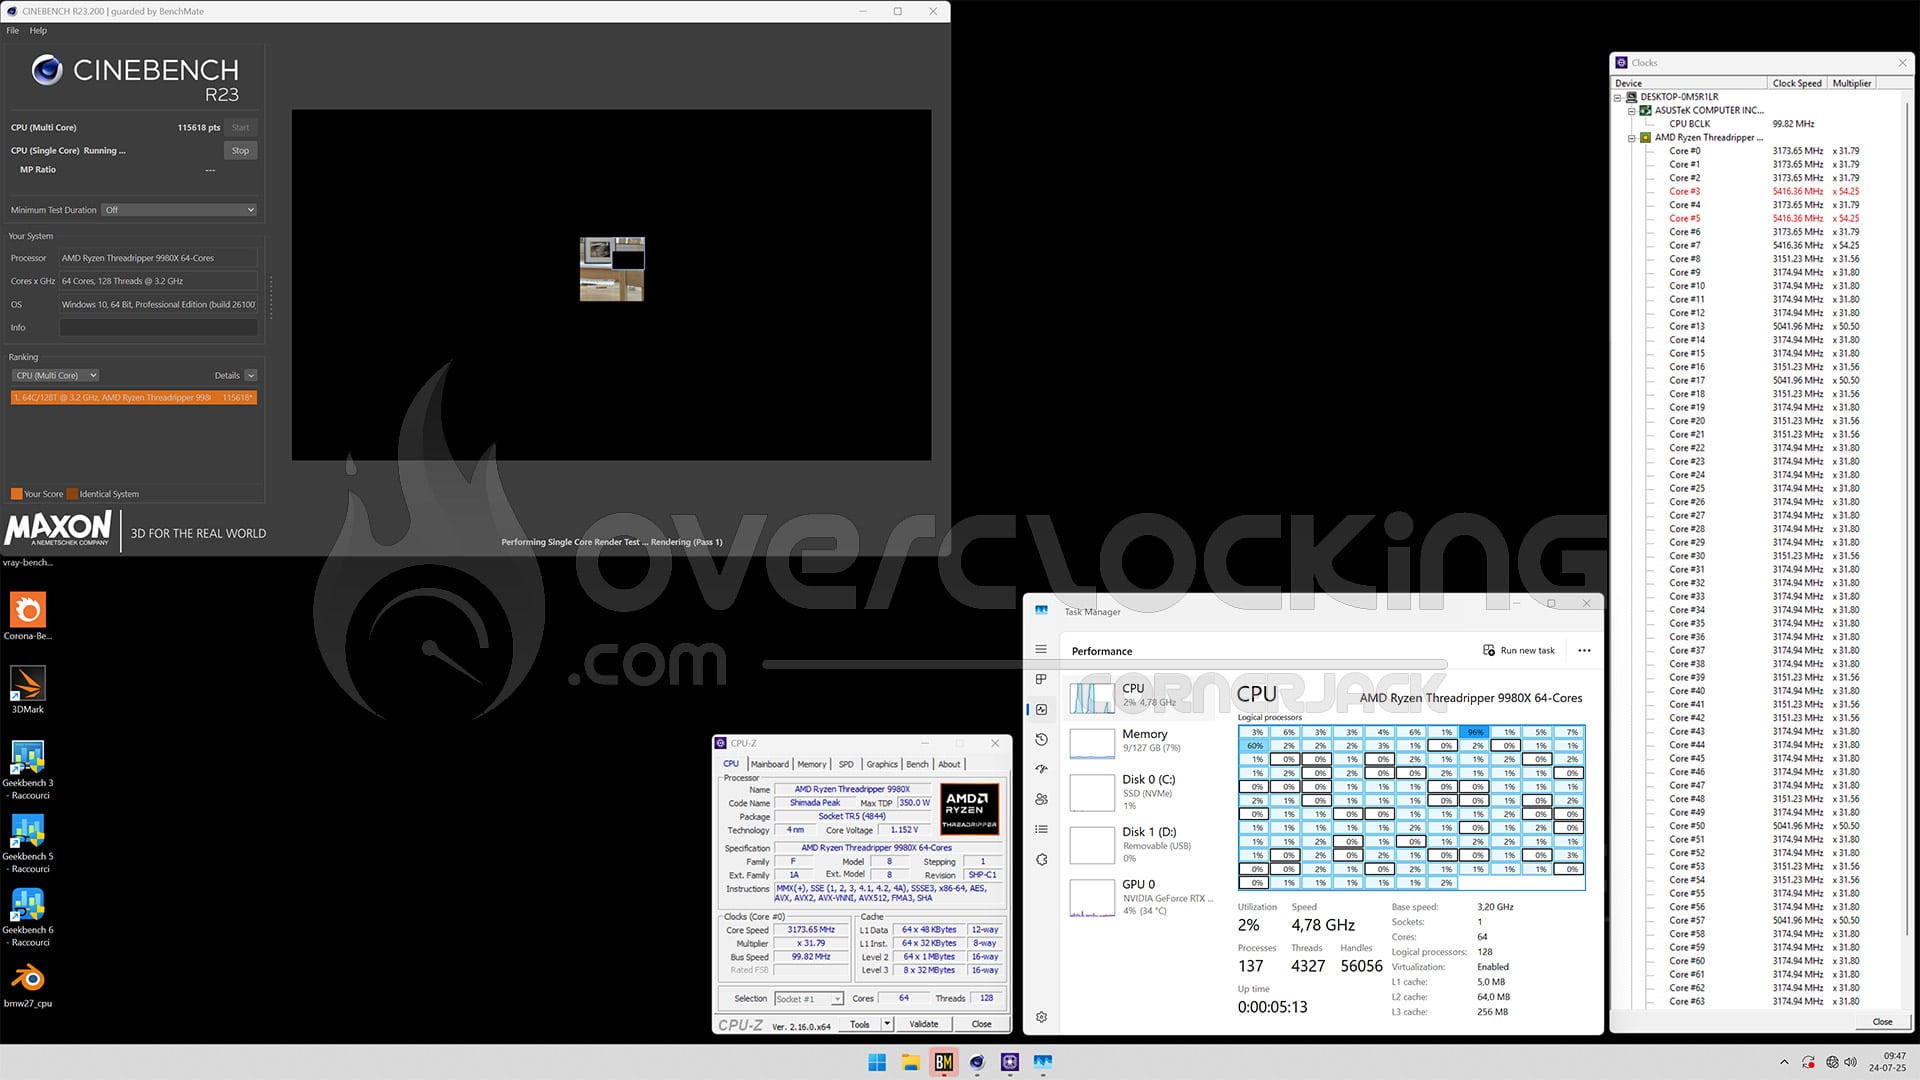
On a single-core application, as announced by AMD, we reach a frequency of 5400 MHz. So everything seems to be working perfectly for our AMD Threadripper 9980X.
Frequencies reached and core activity for the 9970X?
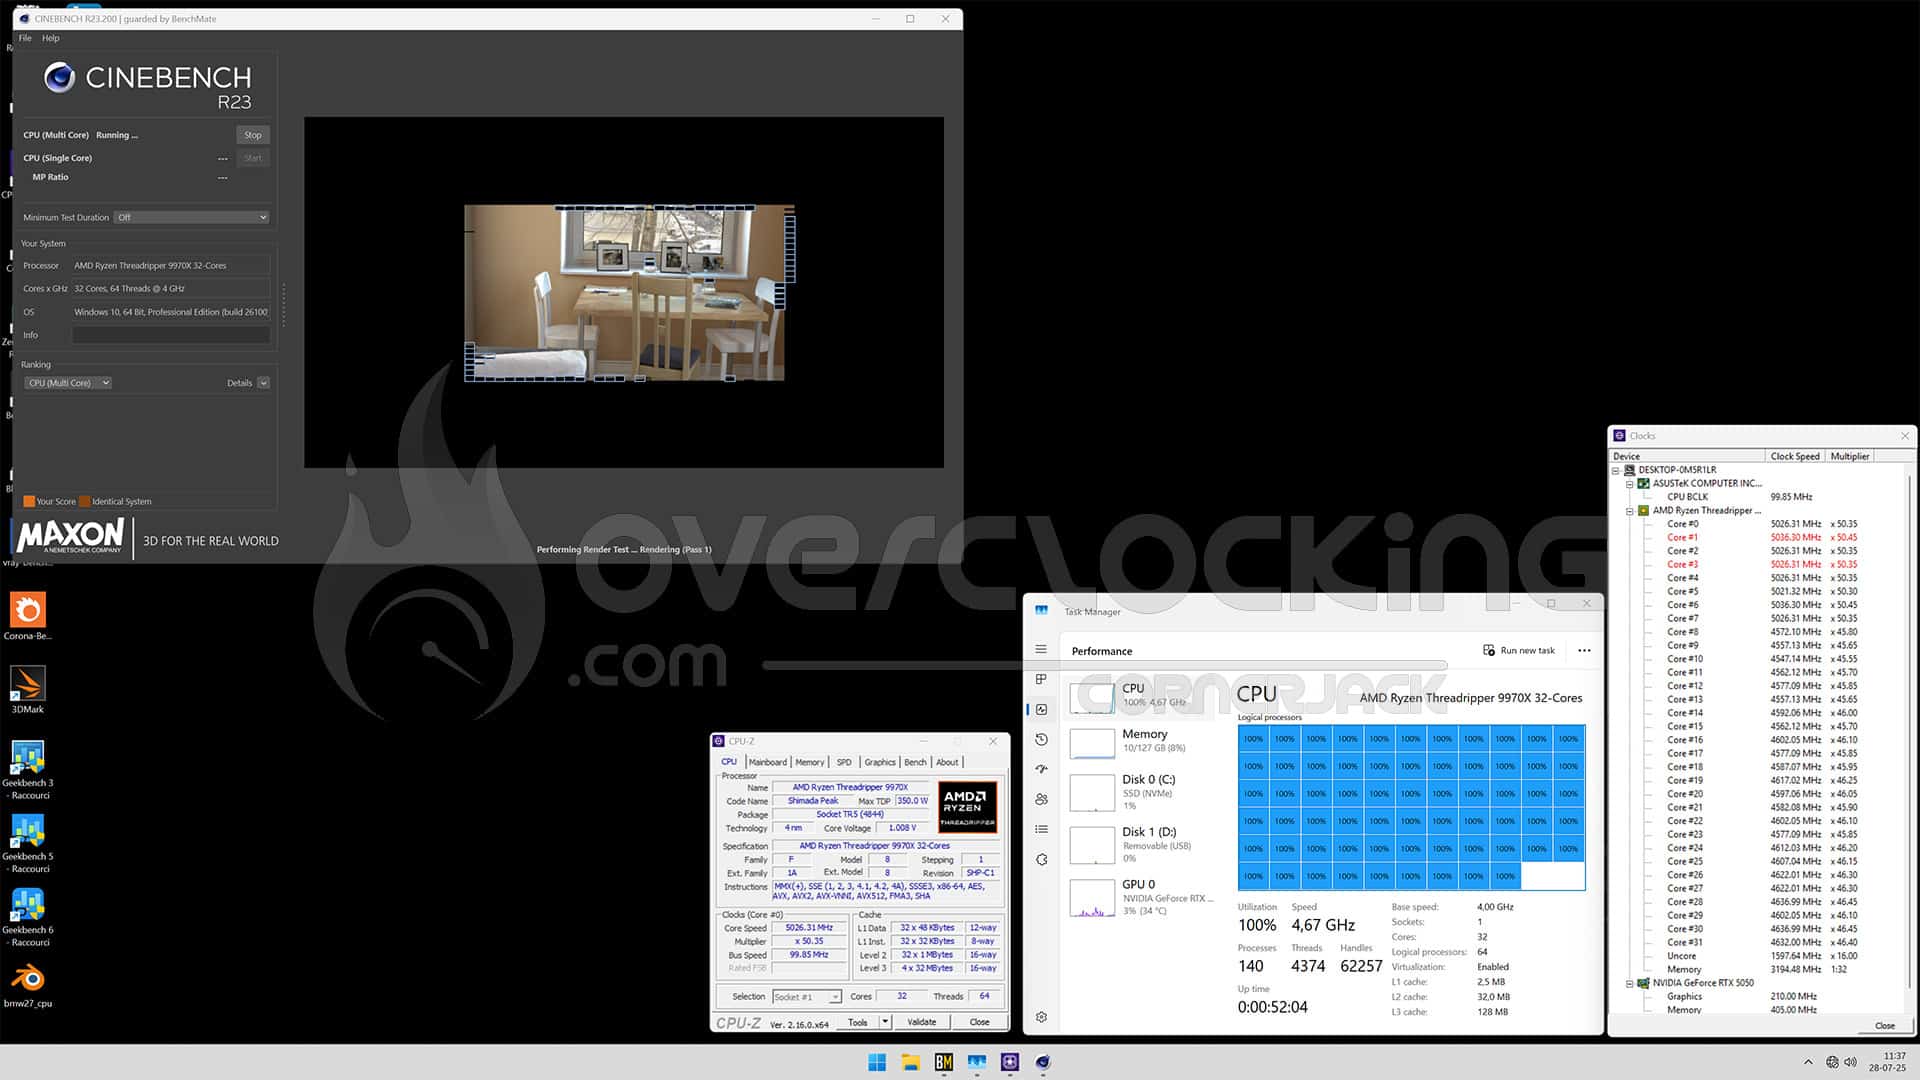
Same principle with the AMD Threadripper 9970X processor. We can see that on a Cinebench R23 benchmark, in multi-core mode, the 32 cores of our 9970X are at 100% of their capacity. The frequency on the first 8 cores is slightly higher, at 5025 MHz, and on the other cores, between 4550 and 4625 MHz.
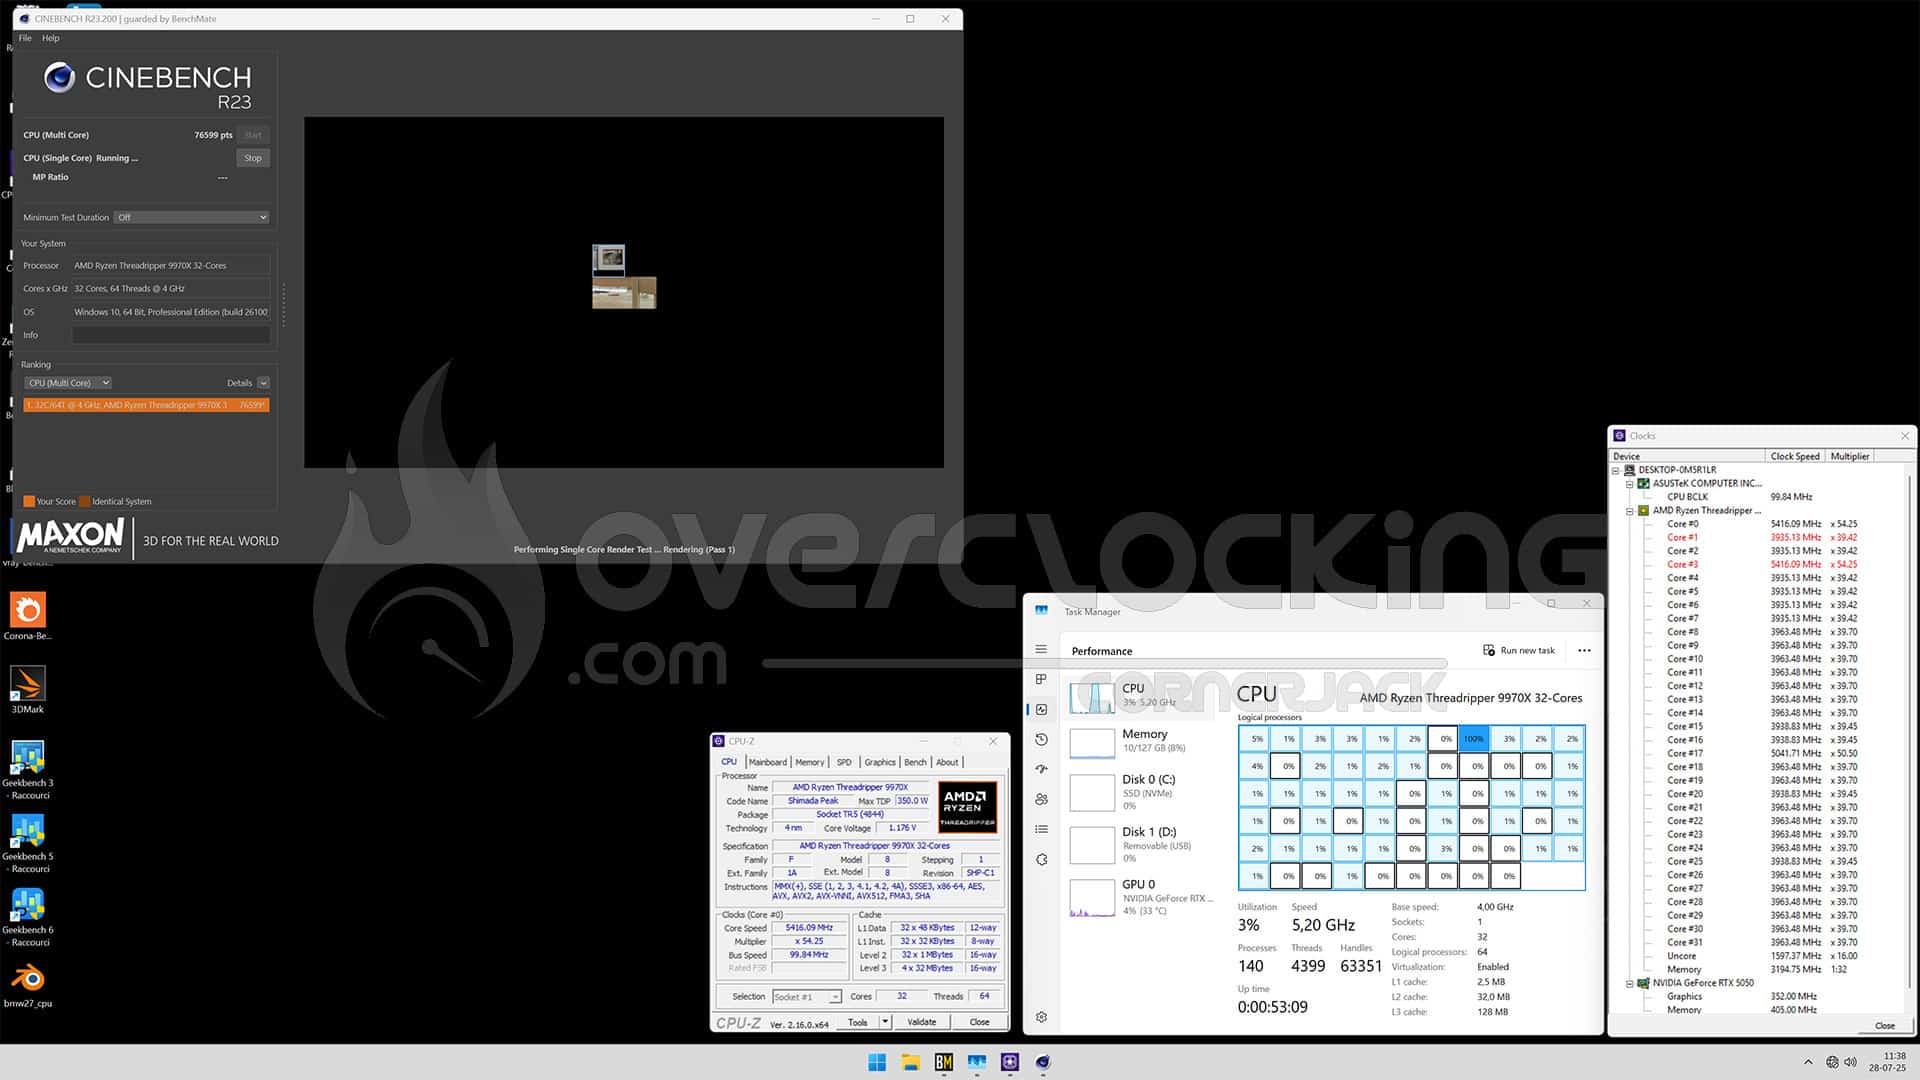
On a single-core application, as announced by AMD, we reach a frequency of 5400 MHz. So everything seems to be working perfectly for our AMD Threadripper 9970X. So we can now begin our tests with peace of mind. nextpage title=”AIDA64 and CPUZ:”] First of all, if you haven’t already done so, we invite you to read the page dedicated to the protocol in order to understand the different profiles present in the BIOS of our ROG Maximus Z890 APEX concerning 14th Gen Intel processors and the new Core Ultra 200S. The idea behind choosing our benchmarks is mainly to be able to run them at home too, so you can compare your readings with ours. As far as the tests with our AMD Ryzen Threadripper are concerned, nothing special 🙂 A small but important remark: with our Threadripper configuration, the frequency of the memory kit is 6400 MT/s, compared with 8000 MT/s for the other platforms. This can have an impact, particularly on the single-core score, as we’ll soon show you, since we found the problem with memory overclocking.
AIDA 64:
This is a software program capable of providing you with a wealth of information about your configuration, but above all it has the special feature of a memory benchmark. This calculates the read, write and copy speeds, as well as the latency, of your memory kit. It is often used to compare memory kits. It’s an excellent tool if you want to compare the performance of your memory kit with those we’ve already had the opportunity to test. No results under AIDA64, the benchmark launches, but after 10 minutes, still no read results. We’re waiting for a new version to run the tests again.
Benchmark CPUZ 17.01.64 :
Simply download the latest version of CPU-Z, which is currently version 2.11. Then go to the ” Bench ” tab to check single-thread and multi-thread performance. The benchmark version we used is 17.01.64.

For the various benchmarks, we’ll take a look at the performance of the previous generation Threadripper 7980X and 7970X. In single-threaded mode, performance improves, but is still far from the top of the ranking, and one of the reasons for this is the limited frequency of 5.4 GHz for this type of task. Fortunately, and logically, in multi-threaded mode, performance explodes. The 9970X gains 12.5% and the 9980X 14.9%.
[nextpage title=”Cinebench and Geekbench:”]
Cinebench R23:
How does this version differ from its predecessors? First of all, it’s more realistic in terms of the score obtained according to the processor used. As a reminder, Cinebench only tests the capabilities of your processor in single or multi-thread mode. But the main difference is that, by default, the benchmark lasts 10 minutes! MAXON’s idea with Cinebench R23 is to offer a benchmark that provides a certain stability in terms of temperature and boost frequencies. Here, we’ll be testing the fast single-core and multi-core versions.

As with CPU-Z, the single-core score improves over the generation, but is positioned at the lower end of our graph, mainly due to the frequency of the memory kit. In multi-core, scores explode, and our Ryzen Threadripper 9980X easily passes the 100K mark.
Cinebench R24:
As you’d expect, this is the latest version of MAXON’s Cinebench benchmark. It was launched in September 2023 to offer more accurate testing of current and next-generation CPUs. You’ll see straight away that scores are lower, the benchmark lasts longer and it’s also possible to evaluate your graphics card.

The same applies to the latest version of Cinebench. As a reminder, we use BenchMate 13.5.0 for some of our tests.
Geekbench 3.4.4:
This is a benchmark available in several revisions, with version 5 being increasingly used in recent months and often used for CPU performance leaks, although the latest version is slowly taking over. It allows you to obtain two scores: one in single core and the other in multi-core. To take full advantage of this benchmark, a license is required. Even if this benchmark is no longer relevant, it is still often used by overclockers to highlight the memoryscore.

No surprise here with Geekbench 3, even if the deviations are smaller in single-core mode , due in particular to the frequency of the memory kit, it’s an incredible score of 365,750 points that we achieve with the Threadripper 9980X.
Geekbench 6.3.0:
We recently received a key for Geekbench version 6. So we took advantage of the change of configuration to add this new benchmark to our test suite. This is the latest benchmark and is intended to be more representative of current configurations. Primate Labs also assures us that the scores displayed by Geekbench 6 are more accurate in relation to the various existing devices and platforms. The test is much longer than the other two versions we use.

With this latest test, the gaps have narrowed, despite the continued dominance of our two samples du jour [nextpage title=”V-Ray 6, Corona and Blender:”].
V-Ray 6:
A new benchmark in addition to those we use to test our processors. The V-Ray 6 benchmark is produced by the Chaos company to enable users to quickly evaluate the rendering speeds of this benchmark for both your processor and your graphics card. The advantage of this benchmark is that it’s free and can be downloaded directly by following this link. You can then compare your score directly with those below, or directly online on the Chaos page.
The domination of our Ryzen Threadripper 9980X is total in this benchmark, as our example passes the 50K mark! This first benchmark clearly demonstrates the usefulness of this type of processor in terms of rendering.
Corona 10:
This is another benchmark from Chaos, which can be downloaded here. The advantage of these two benchmarks is that you can measure your system’s performance by rendering a scene, but without having to run (or even install) other software, as will be the case for the next test.
The profile of this graphic remains unchanged, offering two identical places for our AMD Ryzen Threadripper 9000X.
Blender 4.2:
Blender is a free software package for modeling, computer animation and 3D rendering. We have chosen to download the “BMW27” rendering. The principle of this benchmark is to calculate the rendering of the image. We’ll evaluate the performance of the various processors according to the time needed to complete the rendering. As you can see, the faster the better! You can download Blender and the BMW27 renderer free of charge to test this benchmark.
To conclude with the rendering benchmarks, the “BMW27″ rendering is completed in 17 seconds, whereas the best consumer processors need 54 seconds.
nextpage title=”7-Zip 19.0:”]
7-Zip 19.0:
This benchmark is an integral part of Benchmate software, which we also use for Cinebench tests. The advantage of this tool is that it is validated by Hwobt and can therefore allow you to encode your scores directly onto the platform. 7-Zip, as its name suggests, is a file compression and decompression benchmark. You can either use the one present directly in the 7-zip utility, which will then give you a compression score and a decompression score. Here, with 7-Zip 19.0, the result is an overall score that takes into account both compression and decompression performance. Here too, as Benchmate is free, you can evaluate your score with your own configuration.
The scores obtained with our Ryzen Threadripper 9000X still put them far, far, far ahead.
nextpage title=”3DMark:”]
Let’s start with a series of synthetic tests we use regularly. We’ve opted for the CPU scores of 3DMark’s benchmark series. Here are theresults obtained in Fire Strike and Time Spy. In Fire Strike, for both the “standard” and “ultra” versions, the physics (CPU) test is identical. As a result, you’ll only see the Fire Strike score. For Time Spy and Time Spy Extreme, on the other hand, the tests are different, so you’ll get both scores. These scores are of great interest to overclockers, enabling them to choose the platform offering the best performance for breaking the most records. We’ve also decided to add the “CPU Profile” benchmark, retaining only the max-threads score.
3DMark CPU Profile:
The 3DMark CPU Profile introduces a new approach to CPU benchmarking. Instead of producing a single figure, the 3DMark CPU Profile shows you how your CPU’s performance changes and evolves according to the number of cores and threads used. The 3DMark CPU Profile includes six tests to help you evaluate and compare CPU performance for gaming and other activities. We’ve chosen to isolate only the max-threads score, which represents the CPU’s full performance potential when using all available threads.
Unsurprisingly, the performance of our two Threadrippers is very similar, which is only logical given their core counts of 32 and 64 respectively.
CPU score in Fire Strike :
Let’s start with 3DMark Fire Strike, one of the most widely used benchmarks today. It consists of two graphics tests, a CPU test and a fourth test that combines GPU and CPU. Don’t forget to deactivate the demo, which makes no contribution to the final score and prolongs the benchmark‘s duration (unnecessarily).
This rather old benchmark doesn’t support too many cores. The benchmark therefore fails to take advantage of this, and penalizes our two samples by demoting them to the last two places.
CPU score in Time Spy :
The second test is 3DMark Time Spy. Although this one is performed in 1440p, its main feature is that it uses DirectX 12. It consists of two graphics tests and a CPU test. As with Fire Strike, don’t forget to disable the demo. The first two benchmarks are provided by UL Benchmark.
Unsurprisingly, the same applies to Time Spy, with our two samples coming in last.
CPU score at Time Spy Extreme :
The second test is 3DMark Time Spy. Although this one is performed in 2160p, its main feature is that it uses DirectX 12. It consists of two graphics tests and a CPU test. As with Fire Strike, don’t forget to disable the demo.
This last test changes the game, and Time Spy Extreme will take advantage of all the cores to put our two Threadrippers 9000X back on the top step of the podium.
[nextpage title=”Overclocking capricious? :”]
Let’s start with a word about overclocking in general on this new platform, which is far from obvious. At the moment, it’s hard to say whether it’s my BIOS settings that aren’t right or my two processors that are limited(silicon lottery), but we’re (still) hungry. As you know, we’re going to continue our investigations and report back on our initial results. Let’s start with our copy of the Ryzen Threadripper 9970X, which, as a reminder, in multi-core mode, sees its frequency on the first 8 cores around 5025 MHz, and on the other cores, between 4550 and 4625 MHz. The aim is to force the coefficient x 50 on all 32 cores. We’re going to modify the multiplication coefficient, CPU voltage and loadline calibration.
We achieved stability at 5.2 GHz with a voltage of 1.20 volts (Lvl 6), giving us a Cinebench R23 score of 84,618 points, a 10.1% gain over the reference score. As for the Ryzen Threadripper 9980X, the reference score was 116,193 points with an average 64-core frequency of 4000 MHz.
We managed to push the 64 cores to 4.9 GHz with a voltage of 1,225 volts (Lvl 6), giving us a score of 140,232 points, a gain of 20.7%. As you can see, power consumption rises to 747 watts. The timing of the tests is very long, with numerous reboots that unfortunately take an eternity.
Memory overclocking:
It’s going to be quite simple: we’re in a total mess! Impossible to use the two BIOS profiles. We’re convinced we’re missing something, and despite discussions with bl4ckdot, who also has the same platforms, nothing is happening at the moment.
Well, thanks to safedisk, the BIOS profile 8000 MT/s contains an error and will surely be updated for the next one. If you make the change, the 8000 MT/s CL42 profile will pass without a hitch! Now we’re aiming for 8800 MT/s!
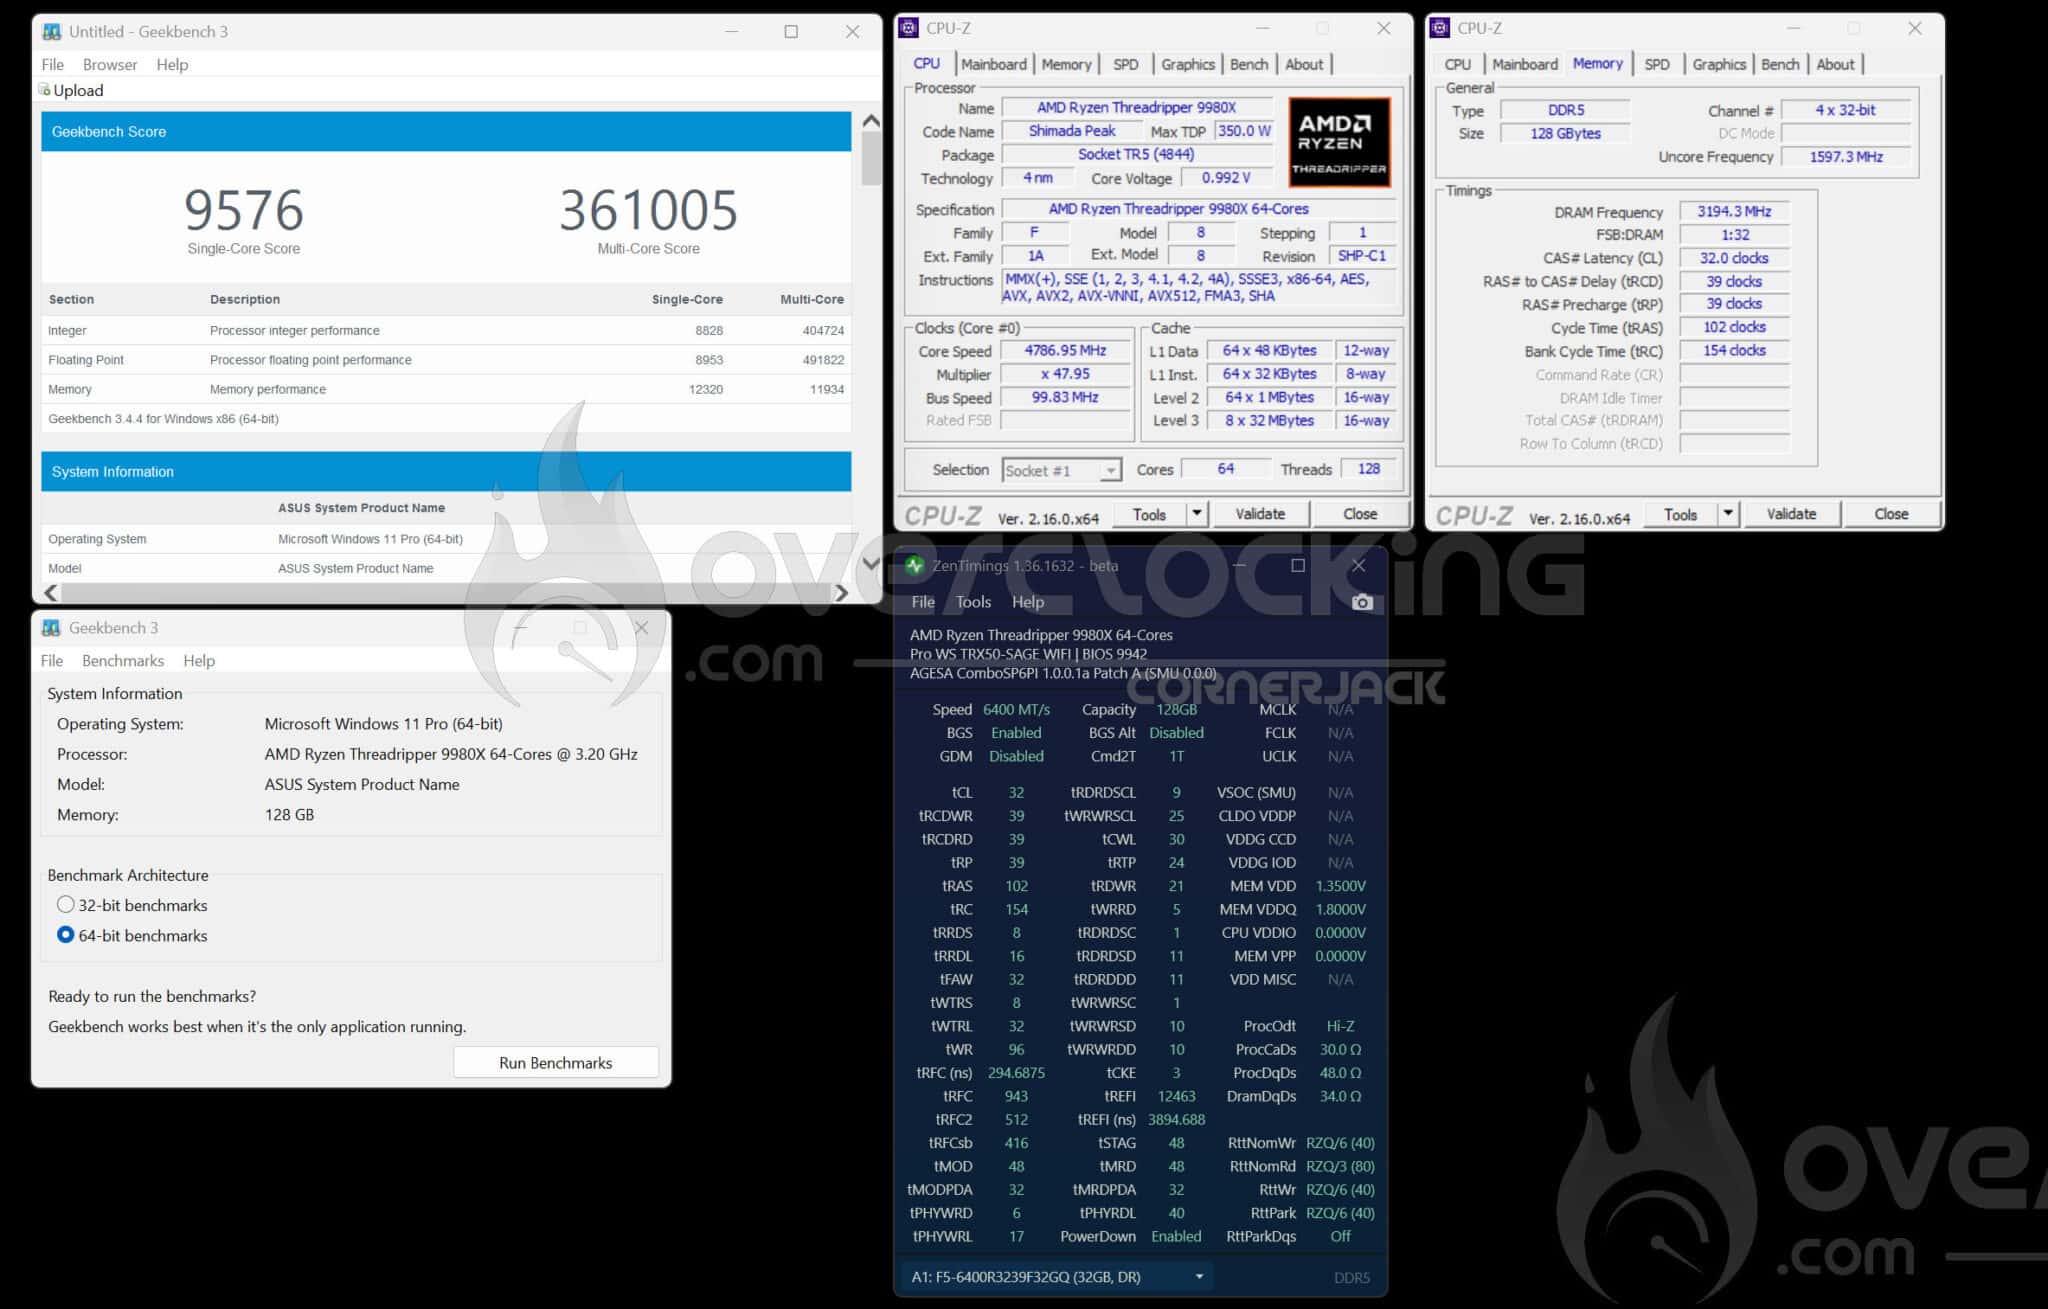
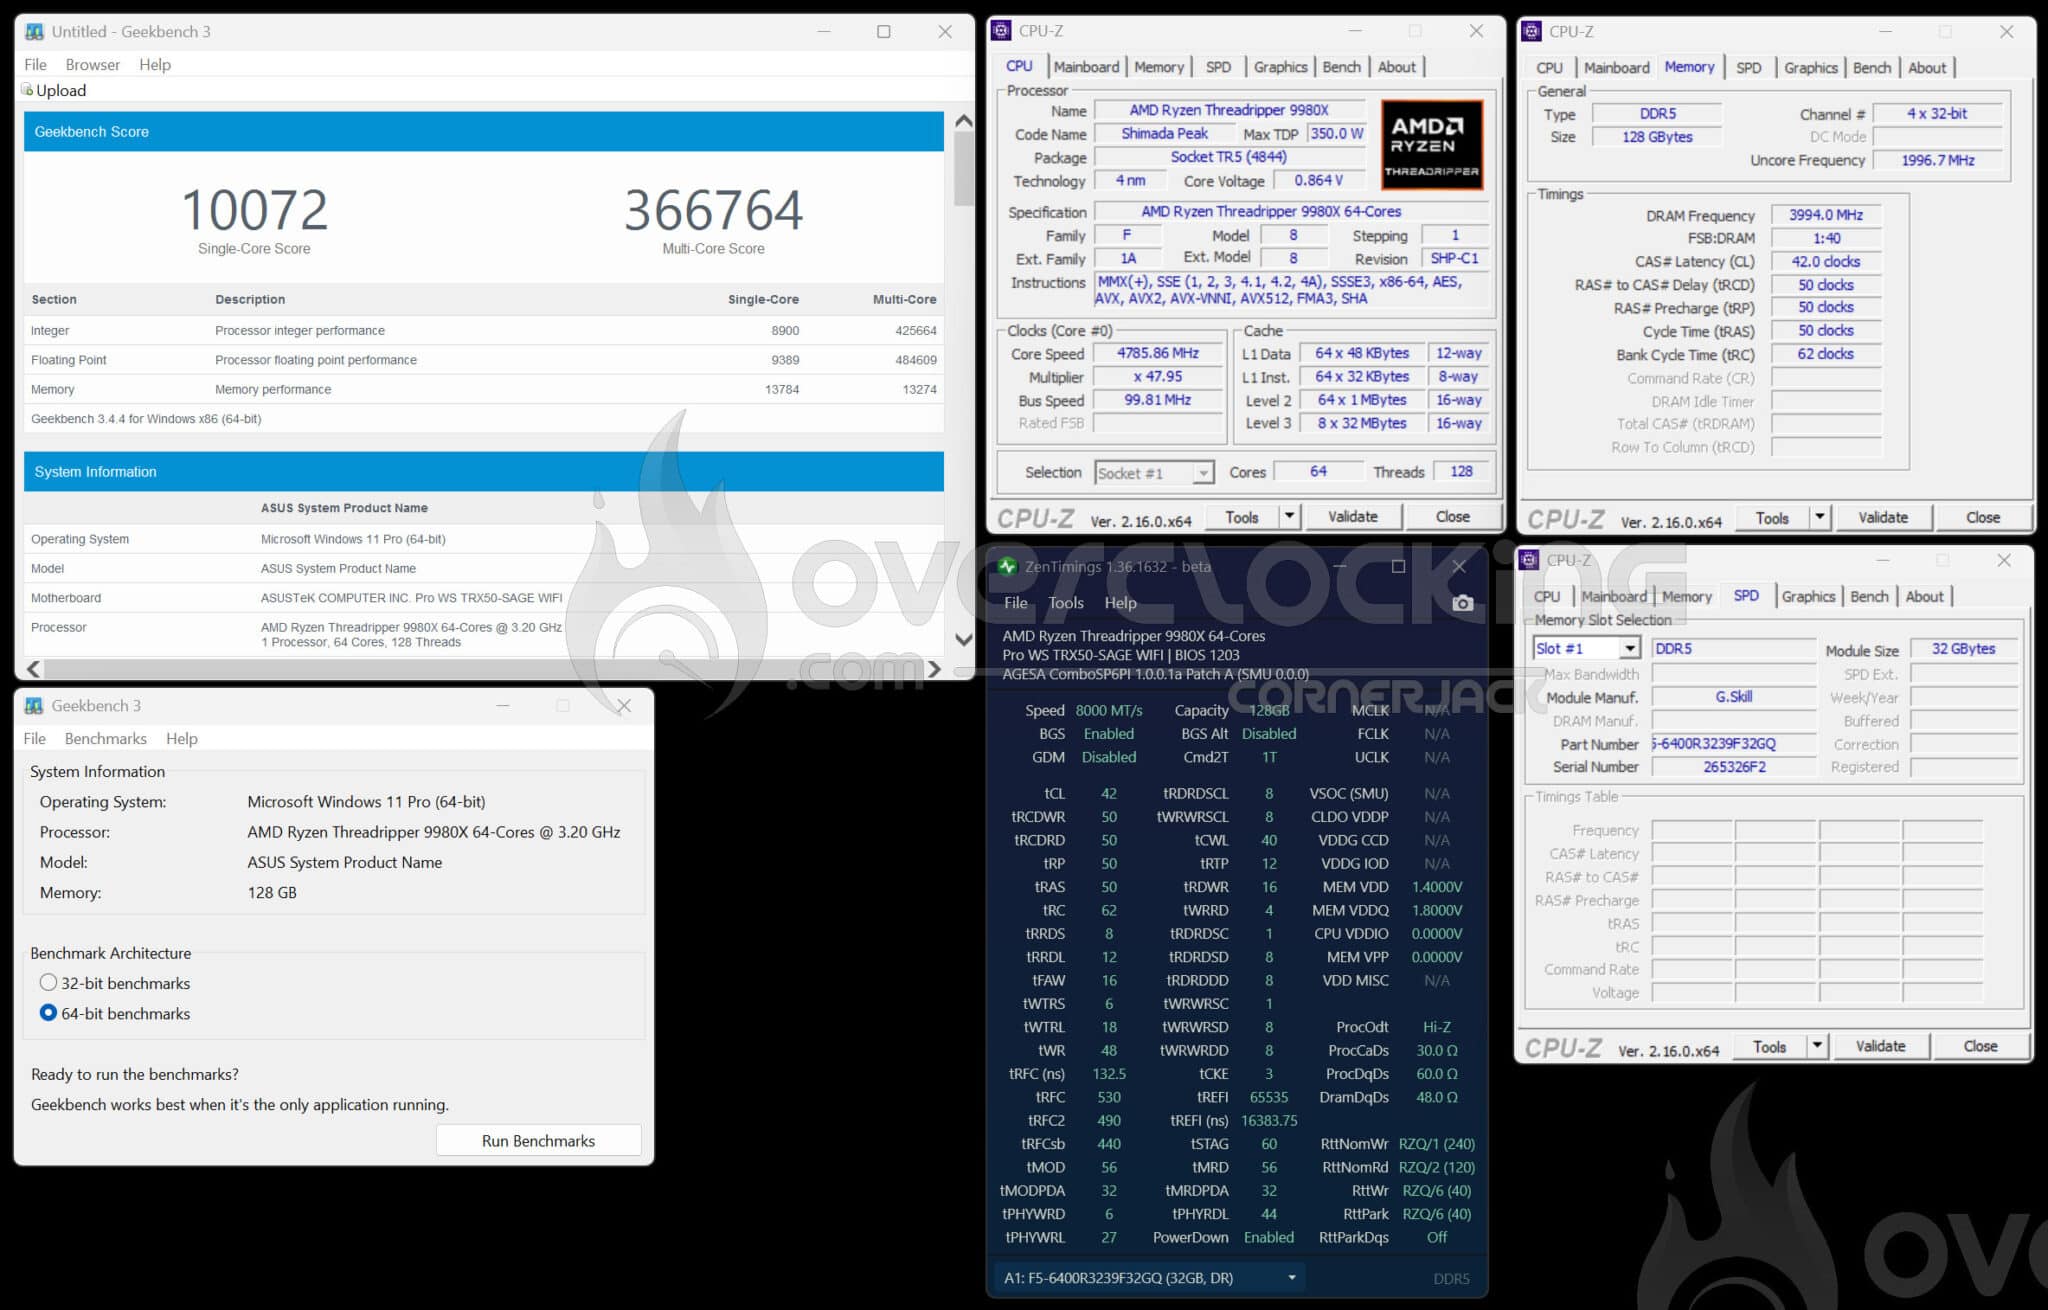
[nextpage title=”The final word:”] We still feel the same way about the previous generation, and it’s a real pleasure to be able to test a platform of this type. When you’re an enthusiast, it’s a real pleasure to have the opportunity to review this type of component, which in the end, if you disregard their price, could very well end up in your configuration. We’d like to thank AMD for allowing us to get our hands on this high-end configuration and for supplying us with the various components. This new generation of Ryzen Threadripper 9000X offers a number of satisfying features. It’s easy to set up, and if you already have a HEDT configuration with an AMD Ryzen Threadripper 7000X processor, you don’t need to change your motherboard or memory kit, just update your BIOS and off you go! Another good point is that, even though these processors cost an arm and a leg, AMD has kept the same launch price as the previous generation. In terms of performance, the gains are appreciable, and our two samples of the day, the 9970X and 9980X, perform on average 16% to 19% better, depending on the benchmark. Remember that this is a “HEDT” platform, which we might call “high-end desktop processors”. Overclocking didn’t seem as obvious as on the previous generation, but temperatures in the lab were quite high, and we didn’t manage to get perfect contact between the processor and our cooling system. We’re going to continue studying this platform with a view to upgrading it to LN2 in a few weeks’ time. The only “big” regret at present is memory overclocking. Compared to what we had achieved with the Threadripper 7000X, we were expecting frequencies in excess of 8000 MT/s, which was not the case. As we said, the problem may lie with our settings, and we’ll look into it.
UPDATE: BIOS profiles contain an error in one of the timings. Thanks to safedisk for the information, we can now boot at 8000 MT/s. So let’s continue our exploration of memory overclocking.
This generation of Ryzen Threadripper 9000X once again merits a “favourite” mention from our editorial team. Many thanks to AMD for making this review kit available to us. We look forward to seeing you in a few weeks’ time, to discover the performance we’ll be able to achieve by drastically lowering temperatures!

