
[nextpage title=”Introduction”]SSUPD Xhuttle : a particularly unconventional chassis. SSUPD is a sister brand of Lian Li. It made a name for itself with its ITX Meshlicious case. Staying true to the DNA of that first model, it subsequently released the Meshroom and variations of it. We certainly weren’t expecting a model of the caliber of this Xhuttle ! Highly original in many ways, it immediately stands out. We built two setups in the white version of this unique case : AIO and custom water cooling.
SSUPD Xhuttle : First Impressions

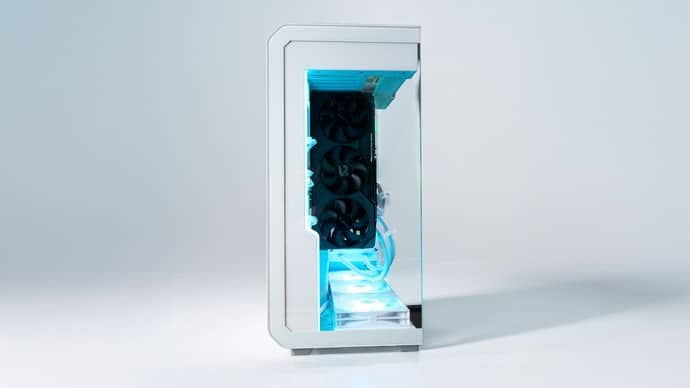
Original ! The Xhuttle stands out, both within the SSUPD lineup, and in the PC case market in general. Although it’s a “classic” dual-chamber chassis (power supply in the rear chamber), the dimensions are quite different from the norm. The same goes for the overall shape. The angles are sometimes sharp, sometimes rounded, and the overall design is asymmetrical. Impressive in photos, it’s actually quite compact in real life. Its dimensions — 417 x 237 x 508 mm — place it among mid-tower cases.
We also note a massive LED strip designed to highlight the case’s lines. The I/O ports are located at the bottom, integrated into one of the feet, while the LED control and power buttons are at the top. “Top” and “bottom” are relative here, as the Xhuttle can be oriented in two different ways. For the remainder of this article, we will consider the top to be the panel housing the LED buttons. Indeed, this is the configuration we preferred for using our machine.
The I/O panel offers:
- 2 x USB 3.0 Type-A
- 1 x USB 3.2 Gen 2 Type-C
- 1 x 3.5 mm audio & mic combo
Removing the Panels
No screw hold the Xhuttle’s panels in place. The clip system seems extremely sturdy and didn’t give us any trouble during disassembly. The top panel can be secured with a small plastic latch.
We take a look at the main chamber, which is also unconventional. At the top of this chamber, the motherboard will be mounted sideways, with I/O ports facing upward. The lower section, intentionally minimalist, is either surprising or unsettling. This chamber allows for the installation of six 120 mm fans : three at the bottom and three on the side. Three daisy-chainable fans from the brand are already installed as standard.

The rear chamber will house the power supply and offers ample space for cable management. Several Velcro strips are already in place to facilitate the task. The user manual even recommends specific cable routing based on the selected components. On the back of the motherboard, we can install a 120 mm fan.
Finally, the upper chamber, dedicated to GPU and motherboard I/O, can accommodate three additional 120 mm fans, bringing the total to ten. This chamber, which is reminiscent of the one on the Geometric Future Model 8, is equipped with a tool-free access panel.
The entire chassis and panels are very well-made. We do have one reservation regarding the paint on our white model. It has little clear coat and is very prone to scratches. The two main fan mounts (bottom and side) are protected by dust filters.
[nextpage title=”Hardware Support”]
SSUPD Xhuttle : Hardware Support
The SSUPD Xhuttle’s unusual dimensions and shape naturally impose some constraints when choosing components. However, these are few, and the case proves surprisingly versatile.
Motherboard
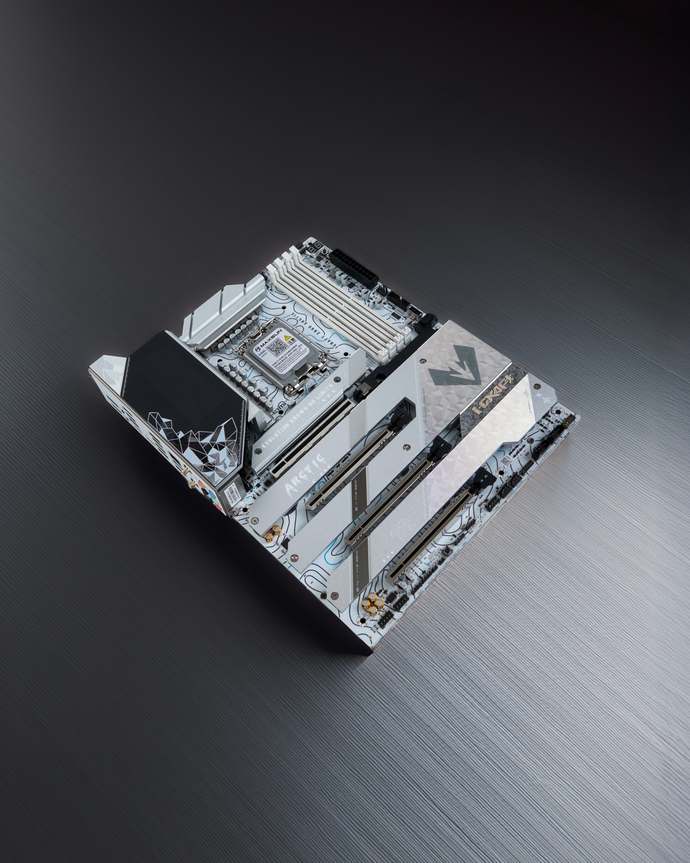
The initial inspection left no doubt on the matter : the motherboard format must not exceed ATX. This is due to the side-mounted placement (I/O facing upward) of the board and the enclosed space beneath it. The brand stands by this design choice, even going so far as to include a cable cover that hides the main connectors.
A pleasant surprise : motherboards with reversed connectors are supported. The cutouts are wide, and there’s more than enough space in the rear. Owners of this type of motherboard will be delighted.
Fan Support
The case can accommodate up to ten fans… under certain conditions :
- Bottom: 3 x 120 mm
- Side: 3 x 120 mm
- Top: 3 x 120 mm provided the GPU is aligned with the chassis’s second PCIe slot
- Rear: 1 x 120 mm behind the motherboard
Upon unboxing, three 120 mm fans are already installed.
Radiator Mount
For installing an AIO, there are only two options available:
- Up to 360 mm at the bottom
- Up to 360 mm on the side
Even the thickest AIOs on the market will be supported, both at the bottom and on the side. In practice, the user won’t necessarily have a choice. The position of the AIO’s pump and the orientation chosen for the Xhuttle will dictate the selected location.
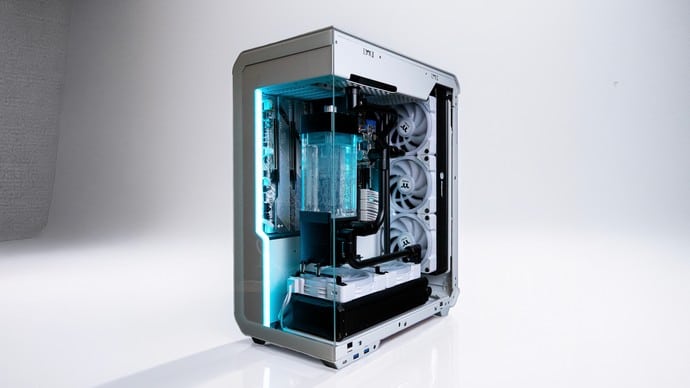
For this test, we’re also looking at custom watercooling compatibility . The bottom and side slots can also accommodate custom radiators up to 360 mm. And there’s plenty of room ! In the lower section, the depth is virtually unlimited. We installed a radiator-fan combo measuring 85 mm without any difficulty. The only constraint will be the length of the graphics card, which should be monitored. On the side, 85 mm will fit, but we limited ourselves to a total of 80 mm to facilitate the routing of the tubes.
Conveniently, both mounts can be removed to install the radiators outside the case. Once in place, they are secured with a screw. In the case of an installation with two radiators, their respective thicknesses may pose constraints. However, the rails allow for several different positions.
CPU Cooling
The CPU cooler can be up to 170 mm tall.
Graphics Card
Graphics cards up to 370 mm in length (be mindful of the bottom radiator if installed) and 160 mm in width are supported. Currently, this allows for the installation of the vast majority of cards on the market.
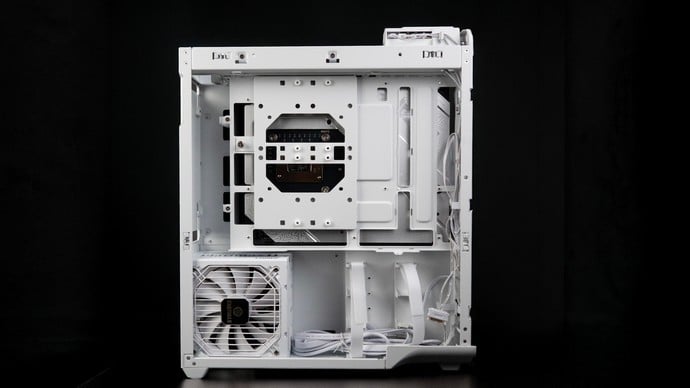
The rear compartment
This compartment is very spacious. Cable management will be a breeze. Power supplies up to 190 mm are supported.
[nextpage title=”Test Configurations”]
SSUPD Xhuttle : Two Configurations
We couldn’t resist repeating the approach we took during the FSP M580 PLUS test: two configurations. The first targets the most common setup with an air-cooled graphics card and a CPU using an AIO. The second, however, will test the custom watercooling capabilities of our Xhuttle.
Components common to both configurations
The motherboard
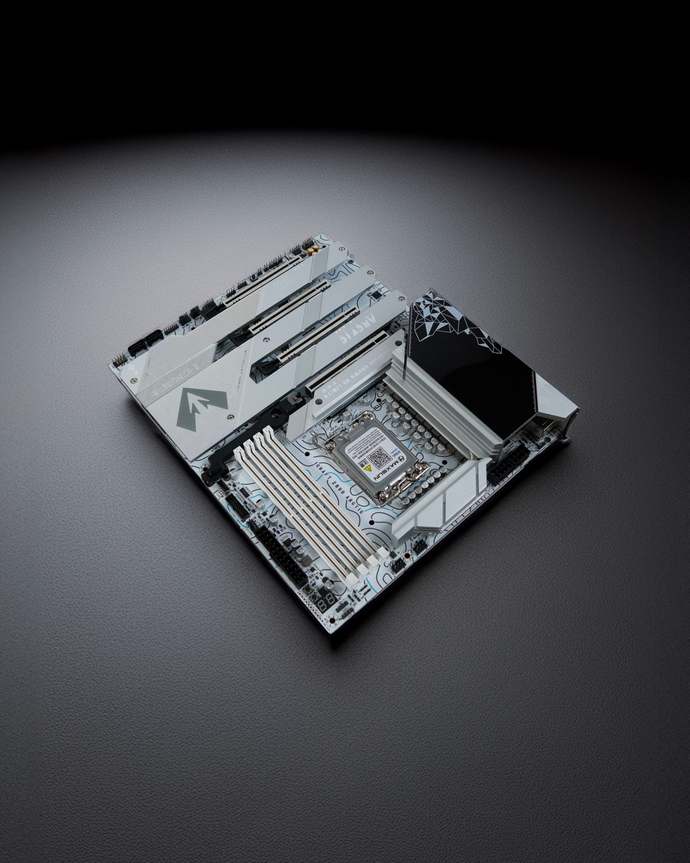
To fit this white chassis, we chose the MAXSUN MS-iCraft Z890 Arctic motherboard. It uses the ATX form factor and joins MAXSUN’s already impressive Z890 lineup. The build quality is impeccable, the design stands out, and it comes equipped with the brand’s new BIOS. A true favorite, now available in Europe.
The processor
For the CPU in both of our configurations, we’ve chosen a highly efficient mid-range model: the Intel Core Ultra 5 245K. It’s a model that doesn’t demand much in terms of cooling but is very versatile.
The graphics card
For the GPU in this mid-range configuration, we’re going with one of the best value-for-money options currently available: the AMD Radeon RX 9070 XT. The air-cooled model is a Gigabyte Gaming OC. The liquid-cooled model is an XFX Mercury equipped with a Bitspower Nebula waterblock. Both are powered by three 8-pin PCIe connectors.
First setup: AIO
For this first build, we’re taking the opportunity to check out the My Valkyrie V360 Lite AIO .
Another favorite, let’s admit it! This AIO aims to combine style with performance, and it does so very well. We’ll be bringing you a detailed review from our editorial team, but we can already say it caught our eye.
This first build is powered by a Thermaltake Thoughpower GT1000 SNOW.
Second configuration: modding
At OCC, we love modding and custom watercooling. Some cases lend themselves better to this than others. The SSUPD Xhuttle often comes up in discussions on the topic —integration capabilities, unique airflow, and so on. We decided to build a loop entirely out of rigid tubing to see for ourselves. And to spice things up a bit: we’ll be using metal tubing.
Radiators and Cooling
Depending on their thickness, the Xhuttle can accommodate two 360mm radiators. However, for purely aesthetic reasons (to fill the gap in the lower section), we chose to use thicker models, limiting ourselves to 240mm at the bottom.
At the bottom, we’ll find a HardwareLabs Multiport 240 mm model, and on the side, a Bitspower Leviathan XF360 mm.
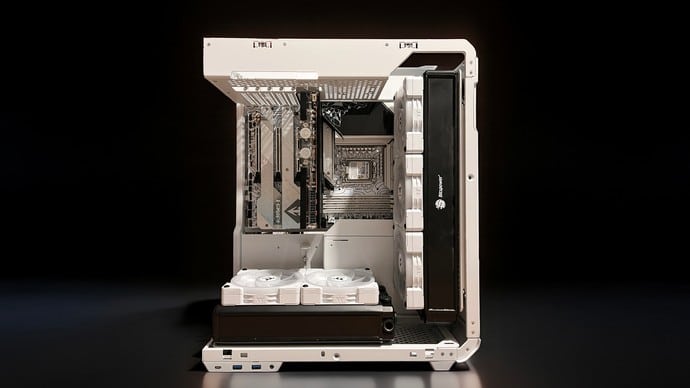
Cooling is provided by six Thermaltake Swafan EX12 ARGB fans.
It goes without saying that our modest setup didn’t need this much capacity, but we’re primarily testing the case’s potential.
Reservoir and Pump
We’re sticking with Bitspower for a high-end glass reservoir : the Premium Cuboid 150 (Hercules Pump)-V2. It features the brand’s Hercules pump. This pump is particularly quiet and efficient, but unfortunately relies on a proprietary pump impeller. It cannot be replaced with a standard D5 or DDC model in the event of a failure.
Water Blocks
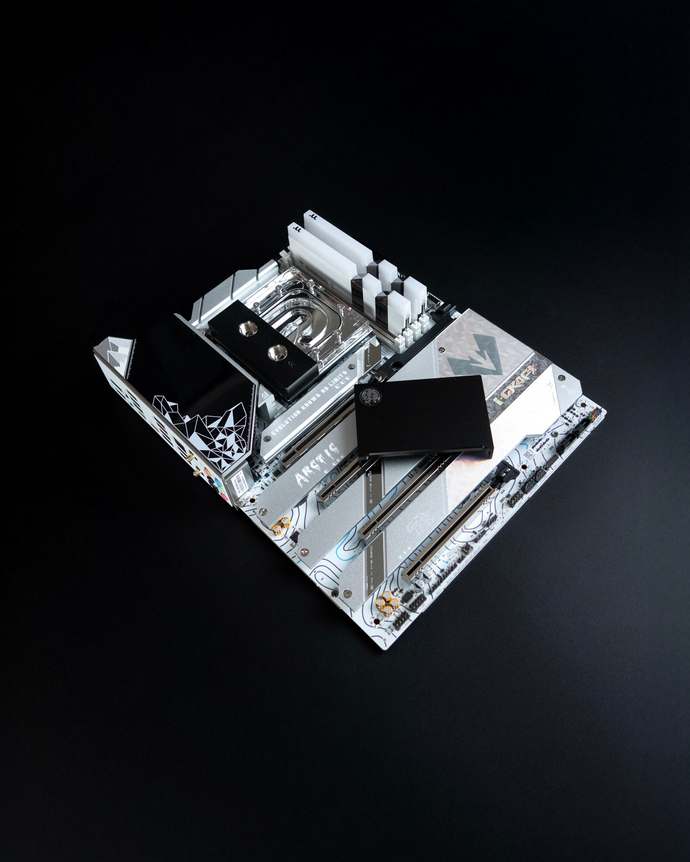
Still from Bitspower, we’re using the Nebula GPU waterblock for the RX 9070 XT. See the FSP M580 PLUS review for details on this block.
For the CPU, we’re introducing the Summit Prime Core waterblock, a new model that’s just arrived at Bitspower. Like the GPU block, it features a removable and customizable front panel. It’s also magnetized.
It’s time to move on to the builds !
[nextpage title=”Building the first configuration”]
SSUPD Xhuttle : First Configuration and General Observations
Assembling this first configuration will also provide an opportunity to make most of the general observations. These will not be repeated in the second part.
Preparing the Motherboard
Here we’ll make our one and only criticism of our MAXSUN MS-iCraft Z890 Arctic. The SSD heatsinks are secured with screws, whereas the competition has largely adopted tool-free mounting.
Otherwise, it’s a breeze. Assembly takes just a few minutes. Installing the My Valkyrie V360 Lite AIO is straightforward. Attach the backplate to the rear of the board, then install the standoffs around the CPU, and finally mount the pump block. Mounting it in the chassis is also a formality. In fact, the fan bracket can be removed (with a single screw) to prepare the radiator outside the case. A real plus. We opt for the side mounting. Installing the radiator for this type of AIO at the bottom would make the pump the highest point in the loop, which is strongly discouraged.
The V360 Lite’s cover features a rather unique “mechanical” look. It stands out from the models with displays that are seen everywhere. It can be rotated in any direction, which is convenient here since the motherboard is rotated 90 degrees.
This means there is only one possible configuration for most AIOs on the market. However, there’s nothing stopping you from rotating the Xhuttle 90 degrees if you’re looking for a different look. In this case, the AIO will be installed in the second slot.
The Graphics Card
For this first build, we’re using an air-cooled card, the Gigabyte RX 9070 XT Gaming OC. Although relatively large, it fits easily into the SSUPD Xhuttle. This is a major plus in itself, but it’s also a matter of personal aesthetic preference. So, unless you have one of the current massive graphics card models (Astral or Noctua, for example), the case might look a bit “empty.” It’s hard to fault the brand for this, but it’s something to keep in mind.
The GPU and motherboard I/O ports are located at the top, in the dedicated compartment.
The power supply and cables : we like it
We mount the Thermaltake Toughpower ATX power supply in the rear compartment and find plenty of space. Cables and extensions management is very straightforward. SSUPD even recommends a specific route for each cable in the user manual. There’s no shortage of space. The original Velcro straps are well-placed, and — a detail that makes all the difference — a removable plastic cover conceals the side of the motherboard near the 24-pin connector.
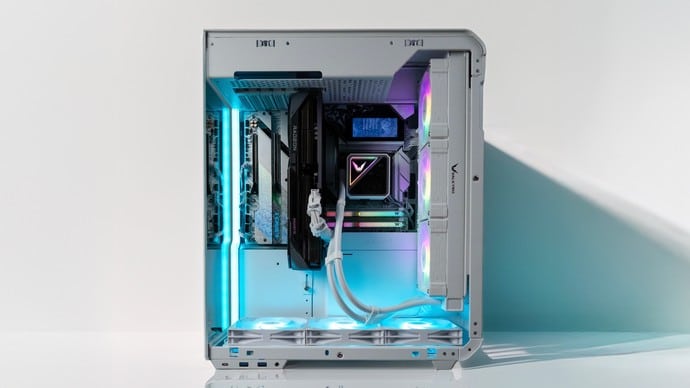
If there were a fly in the ointment, we could mention the GPU power cables. These are more difficult to hide. The use of extension cables (a choice we’ll make for the second build) or custom-made cables is recommended.
SSUPD Xhuttle : Initial Verdict
Assembling a standard setup in the SSUPD Xhuttle is extremely enjoyable. Despite its originality and unconventional design choices, it proves to be user-friendly. The overall user experience is excellent. It will take some getting used to connecting peripherals in the upper compartment, but the access panel (removable without tools) makes the process easy. The Xhuttle’s I/O module remains directly accessible.
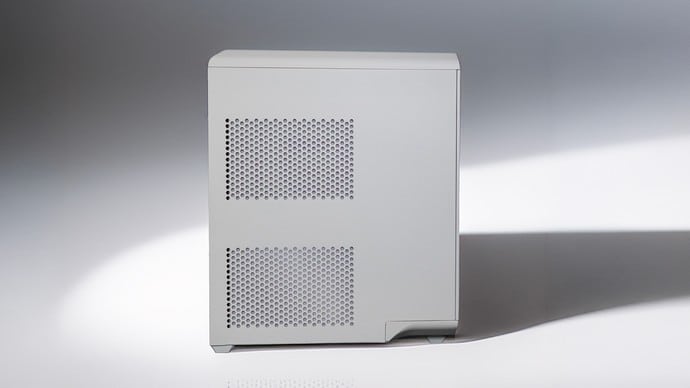
On the desk, its asymmetrical design is impressive. The side panels offer a great view of the components. The RGB strip, controllable via buttons or the motherboard software, is sufficiently dense. Finally, it maintains a compact footprint.
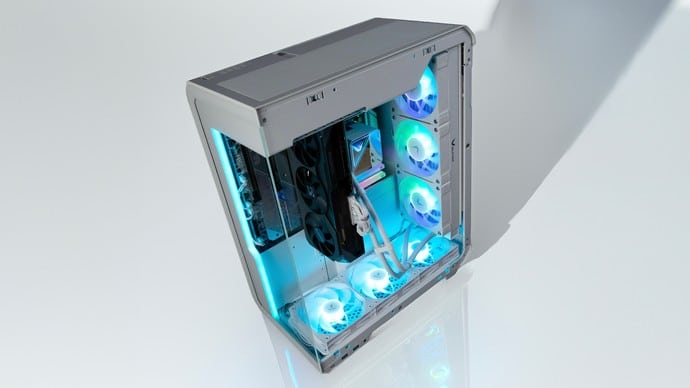
The three stock fans provide satisfactory and fairly natural airflow in our setup. Cool air is drawn in from the bottom and then expelled through the AIO. An appropriate fan curve will help maintain positive pressure. Note that it is possible to add fans at the top. We believe they would add no benefit but would unnecessarily complicate access to the GPU and motherboard ports.
[nextpage title=”Second configuration and verdict”]
SSUPD Xhuttle : Second configuration and custom watercooling
Let’s move on to the custom build ! We were eager to discover for ourselves the chassis’ capabilities in this area.
Preparing the chassis
Before installing any components, we take the time to drill a hole in the upper part of the case, next to the PCIe slots. We add a pass-through there, which will allow us to connect the upper and lower chambers for tube routing.
Installing the Bitspower Summit Prime Water Block
Installing this superb Bitspower waterblock requires removing the CPU’s original ILM. The goal is to achieve the best possible contact with the IHS. We strongly recommend installing the CPU before removing the ILM to protect the CPU socket pins.
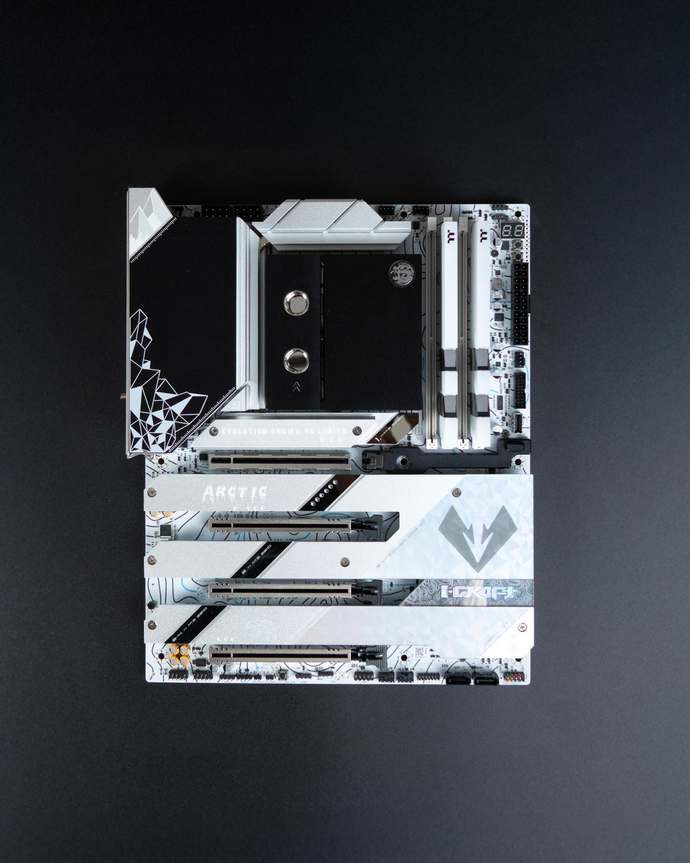
Once the ILM is removed, we install the essential contact frame and then apply thermal paste. Finally, we position and screw in the block. It is secured by four screws on the back of the board. There is no backplate.
We keep the original black cover, but note that it can be customized even after installation (it is magnetic).
The Premium Cuboid Reservoir
This reservoir is made of glass and is a stunning piece. It directly rivals Aquacomputer’s famous Ultitube but features a different style (cubic, as its name suggests).
Our model is equipped with the Bitspower Hercules pump.
We’re going for a black-and-white look for this build, but the Cuboid stands out with a gold accent right in the center. So we’re taking the whole thing apart to paint it black and… flip that accent. Why? Because the large fittings from the new Artemis line are incompatible with this one. When screwing onto the reservoir’s “inlet” port, the fitting’s ring comes into contact with the accent. Simply removing it isn’t an option because it helps maintain the reservoir’s seal (see the video below).
Preparing the Radiators
We remove the two fan mounts from the chassis to make working easier.
For the side, we mount the Bitspower Leviathan 360 mm radiator and three Thermaltake fans with standard blades. They will handle the air exhaust.
On the bottom, we mount the 240 mm radiator and equip it with a drain valve. It will serves as the lowest point in the loop. We complete the setup with two Thermaltake fans featuring reverse-curved blades. These will provide fresh air intake.
We take advantage of the ease of installation to mount the reservoir on one of the fans using the optional bracket (not included with the reservoir but sold by Bitspower). To secure the first metal tube between the reservoir and the radiator without constraining it, we add standoffs under the reservoir. The Bitspower brass tubes come pre-bent at a 90° angle ; 45° angles are not available. We therefore need those extra few millimeters in height.
Once everything is ready, we easily reposition it at the bottom of the chassis and secure it with the provided screw.
Artemis Tubes and Fittings
We’re taking advantage of this setup to explore Bitspower’s Artemis line in more detail. The new models are a stark departure from the brand’s previous visual identity. And we’re not complaining. They fully embrace their imposing look and the bulk that comes with it. In fact, they won’t suit every use case and should be avoided in tight spaces.
But here, in the Xhuttle’s spacious main chamber, they add real visual character. The range is cohesive and fairly comprehensive ; the only thing missing is matching offset fittings.
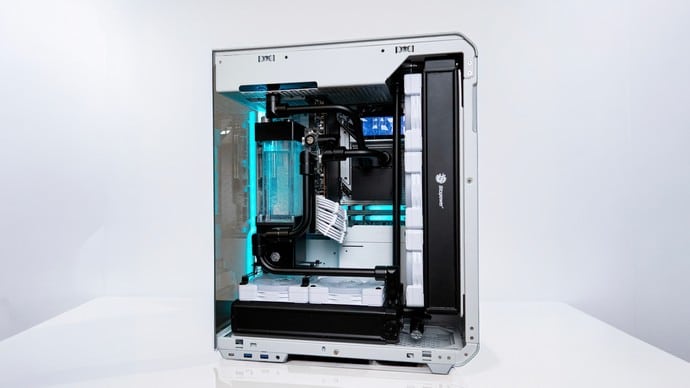
The Artemis 14 mm rigid fittings feature a very robust sealing system consisting of a single wide gasket held in place by a small ring positioned before the main ring. This ensures that pressure is applied evenly to the gasket, resulting in a perfect fit within the housing. A resounding success in practice : we encountered no difficulty in achieving a leak-tight seal. Yet we are using metal tubes, which are known for tolerating no inaccuracies. After the clamping ring, a magnetic decorative ring completes the aesthetic of the assembly. The magnetism is weak, and the hold of this decorative element is disappointing. The Artemis assembly and Bitspower brass tubes go very well together.
Final Result
All that remains is to take precise measurements and cut our tubes accordingly. The assembly goes very smoothly. Accessibility is more than satisfactory, and our loop is taking shape. Once the leak test (0.5 bar) is complete, we move on to filling the system.
Purging the air from the circuit takes a relatively long time. The highest point of the circuit, formed by the tube installed in the I/O chamber, is higher than the air vent on the tank. But the air inevitably ends up reaching the tank and being vented.
We did not run any benchmarks on this setup. The custom configuration is significantly oversized, and it seemed obvious to us that it would cool our components without difficulty. Above all, it was immediately destined to become the dedicated streaming PC for OCC modding livestreams. We tested it immediately for this purpose.
A few adjustments and… streaming !
Just before going live, we took the time to update all the drivers and the MAXSUN BIOS. The BIOS update was performed directly from within the BIOS itself using the dedicated tab.
To achieve positive pressure while minimizing noise, we set two fan speed curves with a roughly 20% difference between the two “intake” fans and the three exhaust fans. The pump is set to 60% of its rated speed.
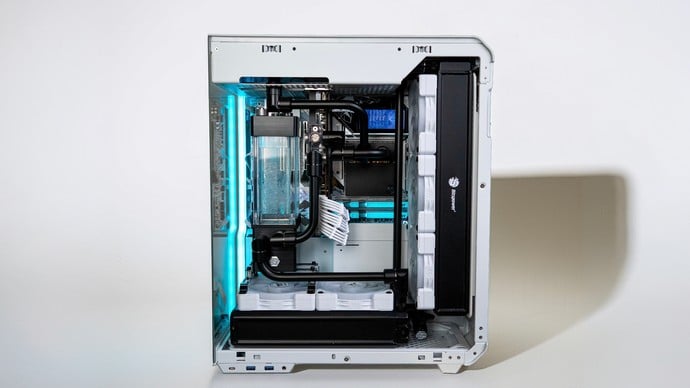
The result is very satisfactory. We won’t call the PC inaudible, as the Swafans ARGB are louder than their Toughfans counterparts at equivalent speeds. But the noise level is more than tolerable and didn’t disrupt the live stream in any way. From a few centimeters away, we can barely hear the pump.
After three hours of live streaming, the GPU and CPU categorically refuse to exceed 50°C. Their average temperature is closer to 35°C. Not surprisingly.
Conclusion
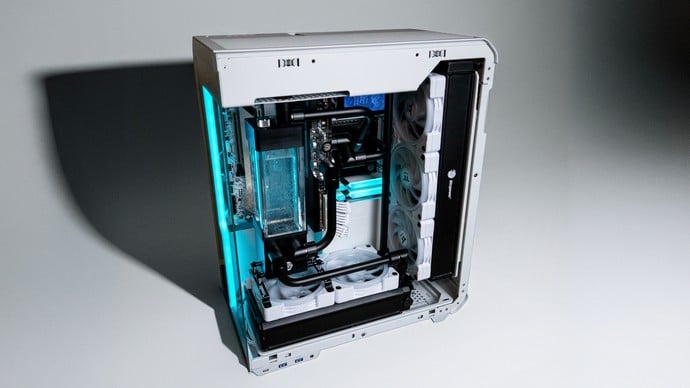
In a nutshell, the SSUPD Xhuttle is an excellent case. It successfully combines originality and ease of use in a stylish package. It does have a few limitations detailed in this review, but they seem minor compared to what it offers otherwise.
Ultimate showcase chassis, it lends itself readily to custom watercooling. It isn’t the best (we had to drill holes to achieve perfect tube routing), but it easily rivals the top performers in the field.
SSUPD takes a bold step in a new direction with this model and imposes its style with flair.

